

Create your first campaign
Who this is for: buyers and networks setting up their first campaign in Moja. What you’ll need: a Moja account, the destination number or SIP endpoint for one buyer, and the payout terms you have agreed with both your traffic source and your buyer. Time: about 45 minutes, including a test call.
By the end of this guide you will have a static, number-based campaign that takes a call on a tracking number, routes it to one buyer, and shows up in your call log with the right publisher, payout, and conversion status.
Video walkthrough: Watch the full campaign setup walkthrough (about 20 minutes).
How the pieces fit together
Section titled “How the pieces fit together”Moja models a call as a chain. Each record in the chain points at the one before it, so you build them in order and nothing is left dangling.
flowchart LR
  P[Publisher<br/>who sends the call] --> N[Tracking number]
  N --> C[Campaign<br/>recording, caps, scrubbing]
  C --> R[Routing plan<br/>ordered list of destinations]
  R --> T[Target<br/>number or SIP endpoint]
  T --> B[Buyer<br/>who pays for the call]
Build in this order: Publisher → Buyer → Target → Routing plan → Campaign → Tracking number + publisher payout.
Before you begin
Section titled “Before you begin”Collect these before you open the portal. Every one of them is a field you will be asked for.
- The publisher or source that will send the calls
- The buyer that will receive them
- The buyer’s destination phone number or SIP endpoint
- The buyer payout amount and the conversion rule that earns it
- The publisher payout amount and its payout rule
- Whether this campaign needs call recording, TCPA scrubbing, caps, duplicate rules, webhooks, or QAI — for a first campaign, the answer to all of these should be no
Step 1 — Create the publisher record
Section titled “Step 1 — Create the publisher record”The publisher is the source of the calls: an affiliate, a media buyer, or your own marketing.
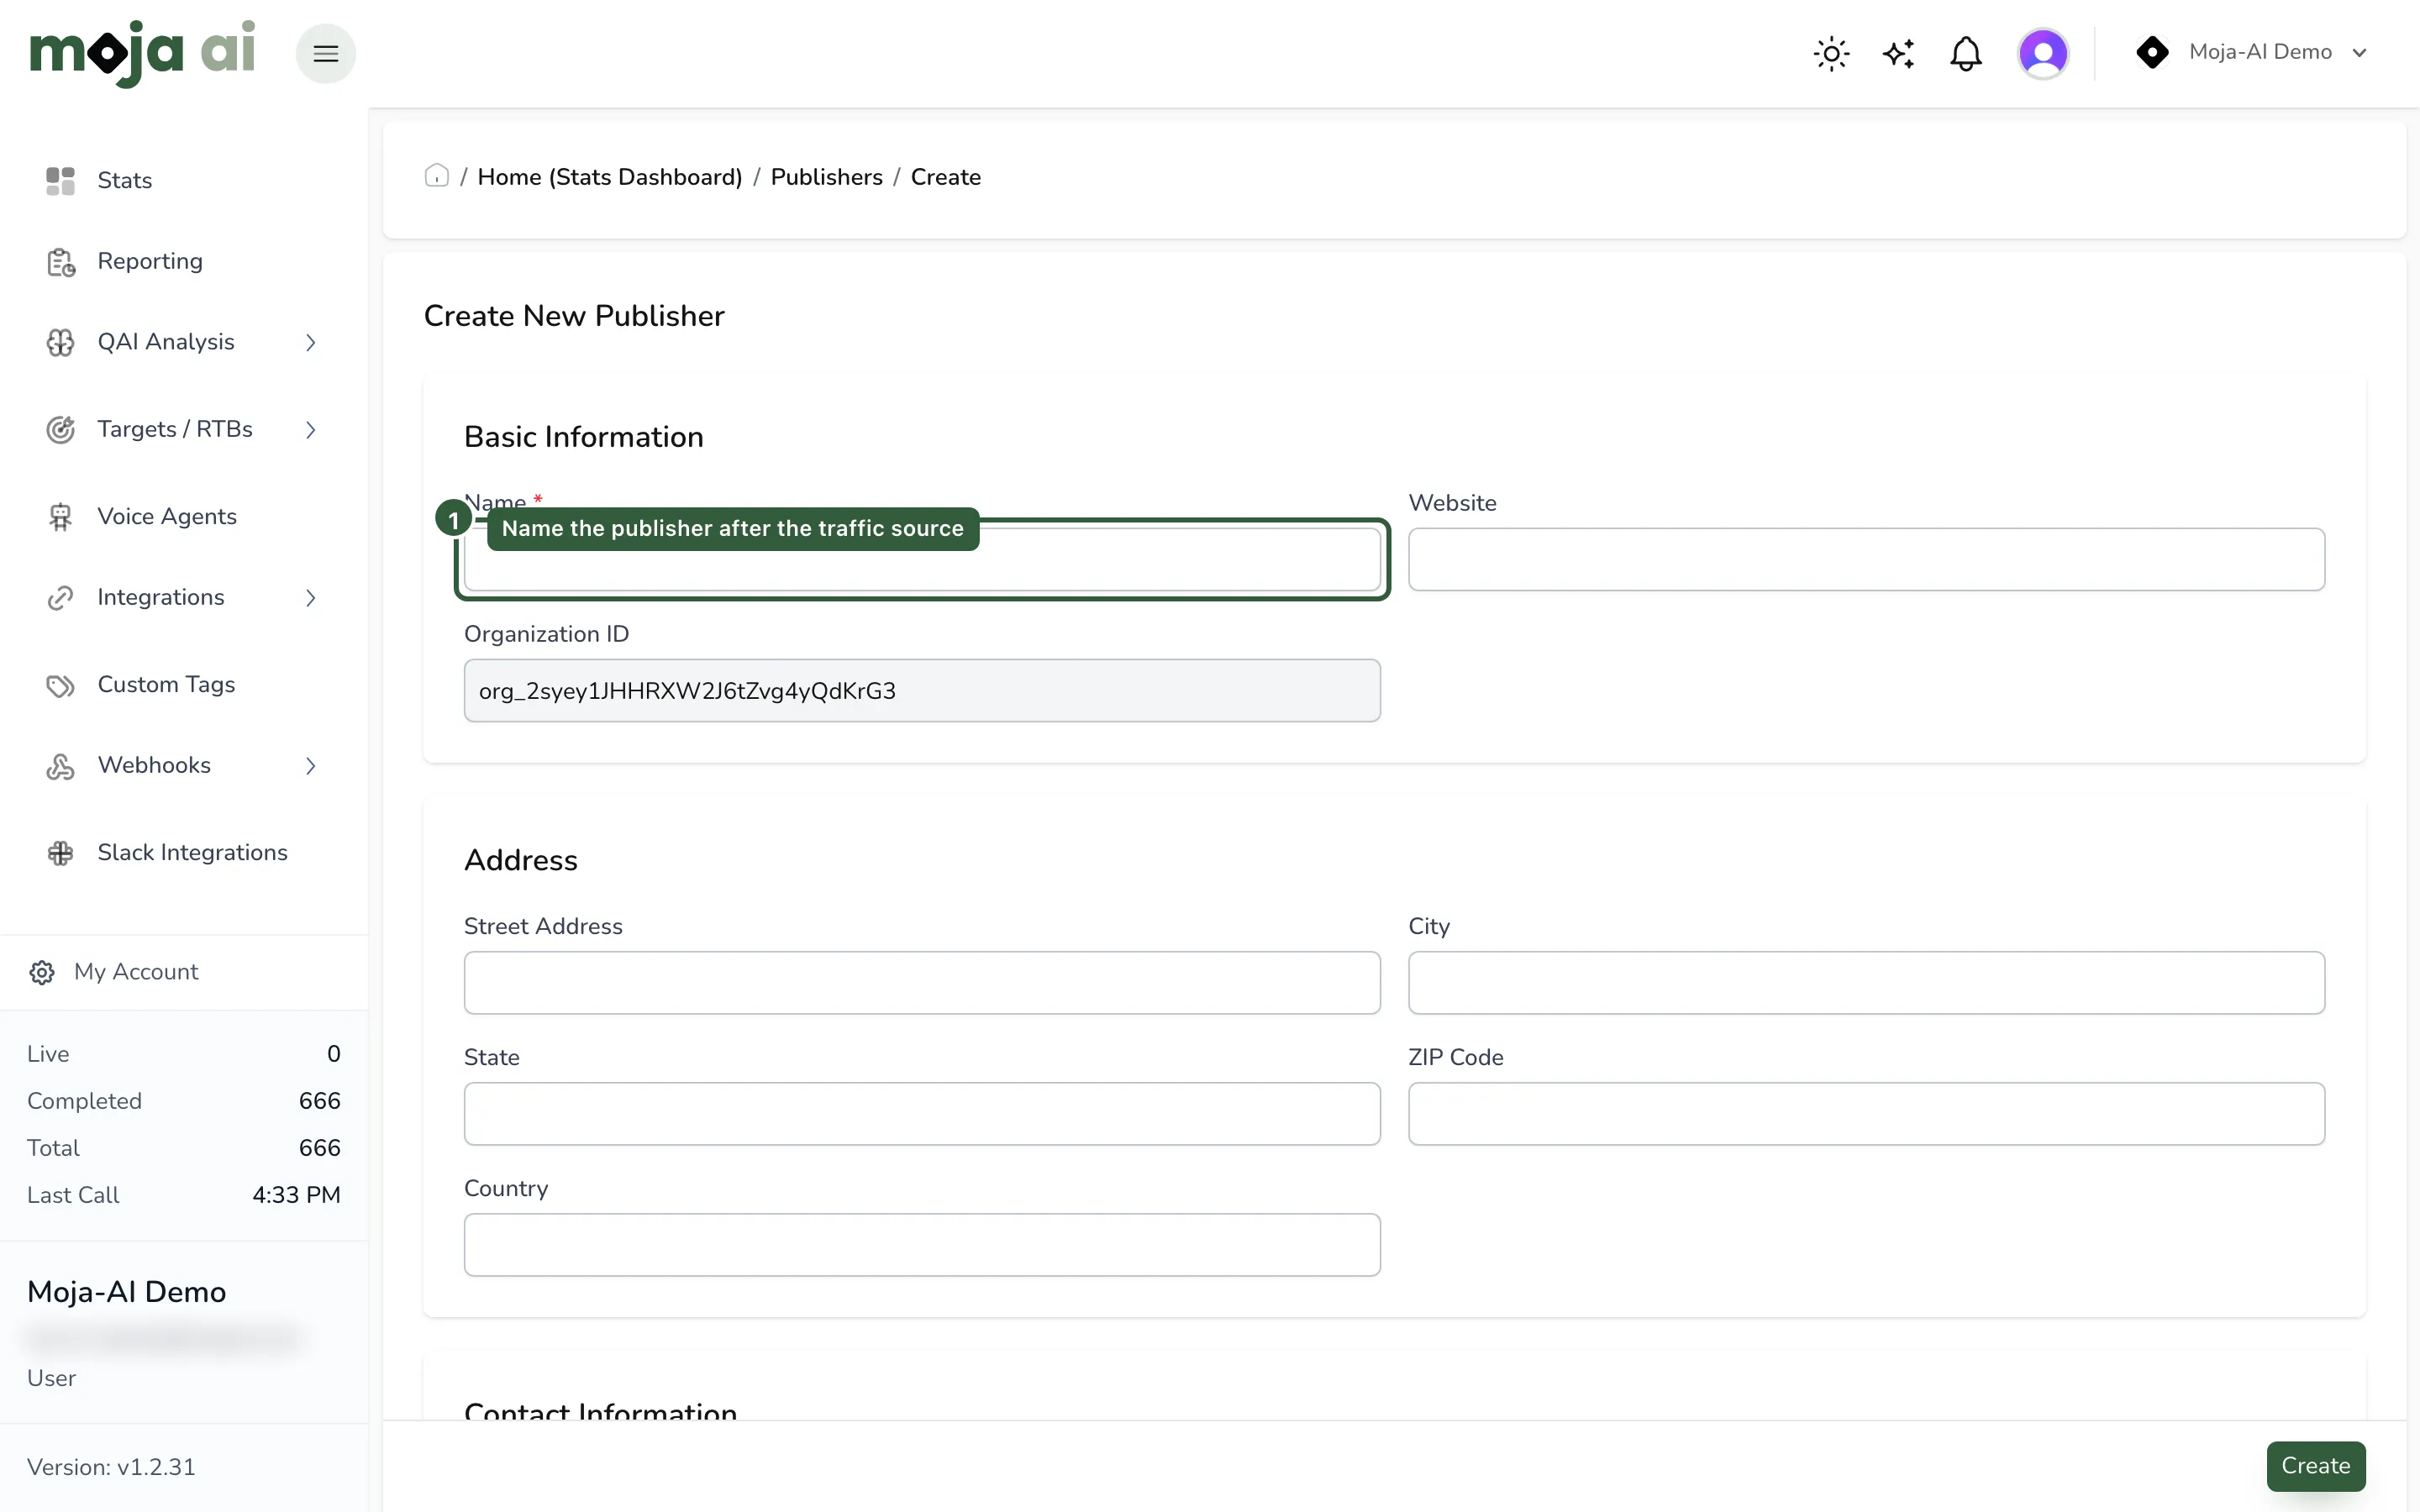
- Go to Publishers.
- Click Create New.
- Enter the publisher name. Use the real source of the calls; if the traffic is your own, name it something unambiguous like Internal Publisher.
- Review the optional settings — call recording permissions and access for later review.
- Save the publisher record.
Expected result: the publisher appears in the Publishers list and is selectable elsewhere in the portal.
Step 2 — Create the buyer record
Section titled “Step 2 — Create the buyer record”The buyer is who you are selling the call to.
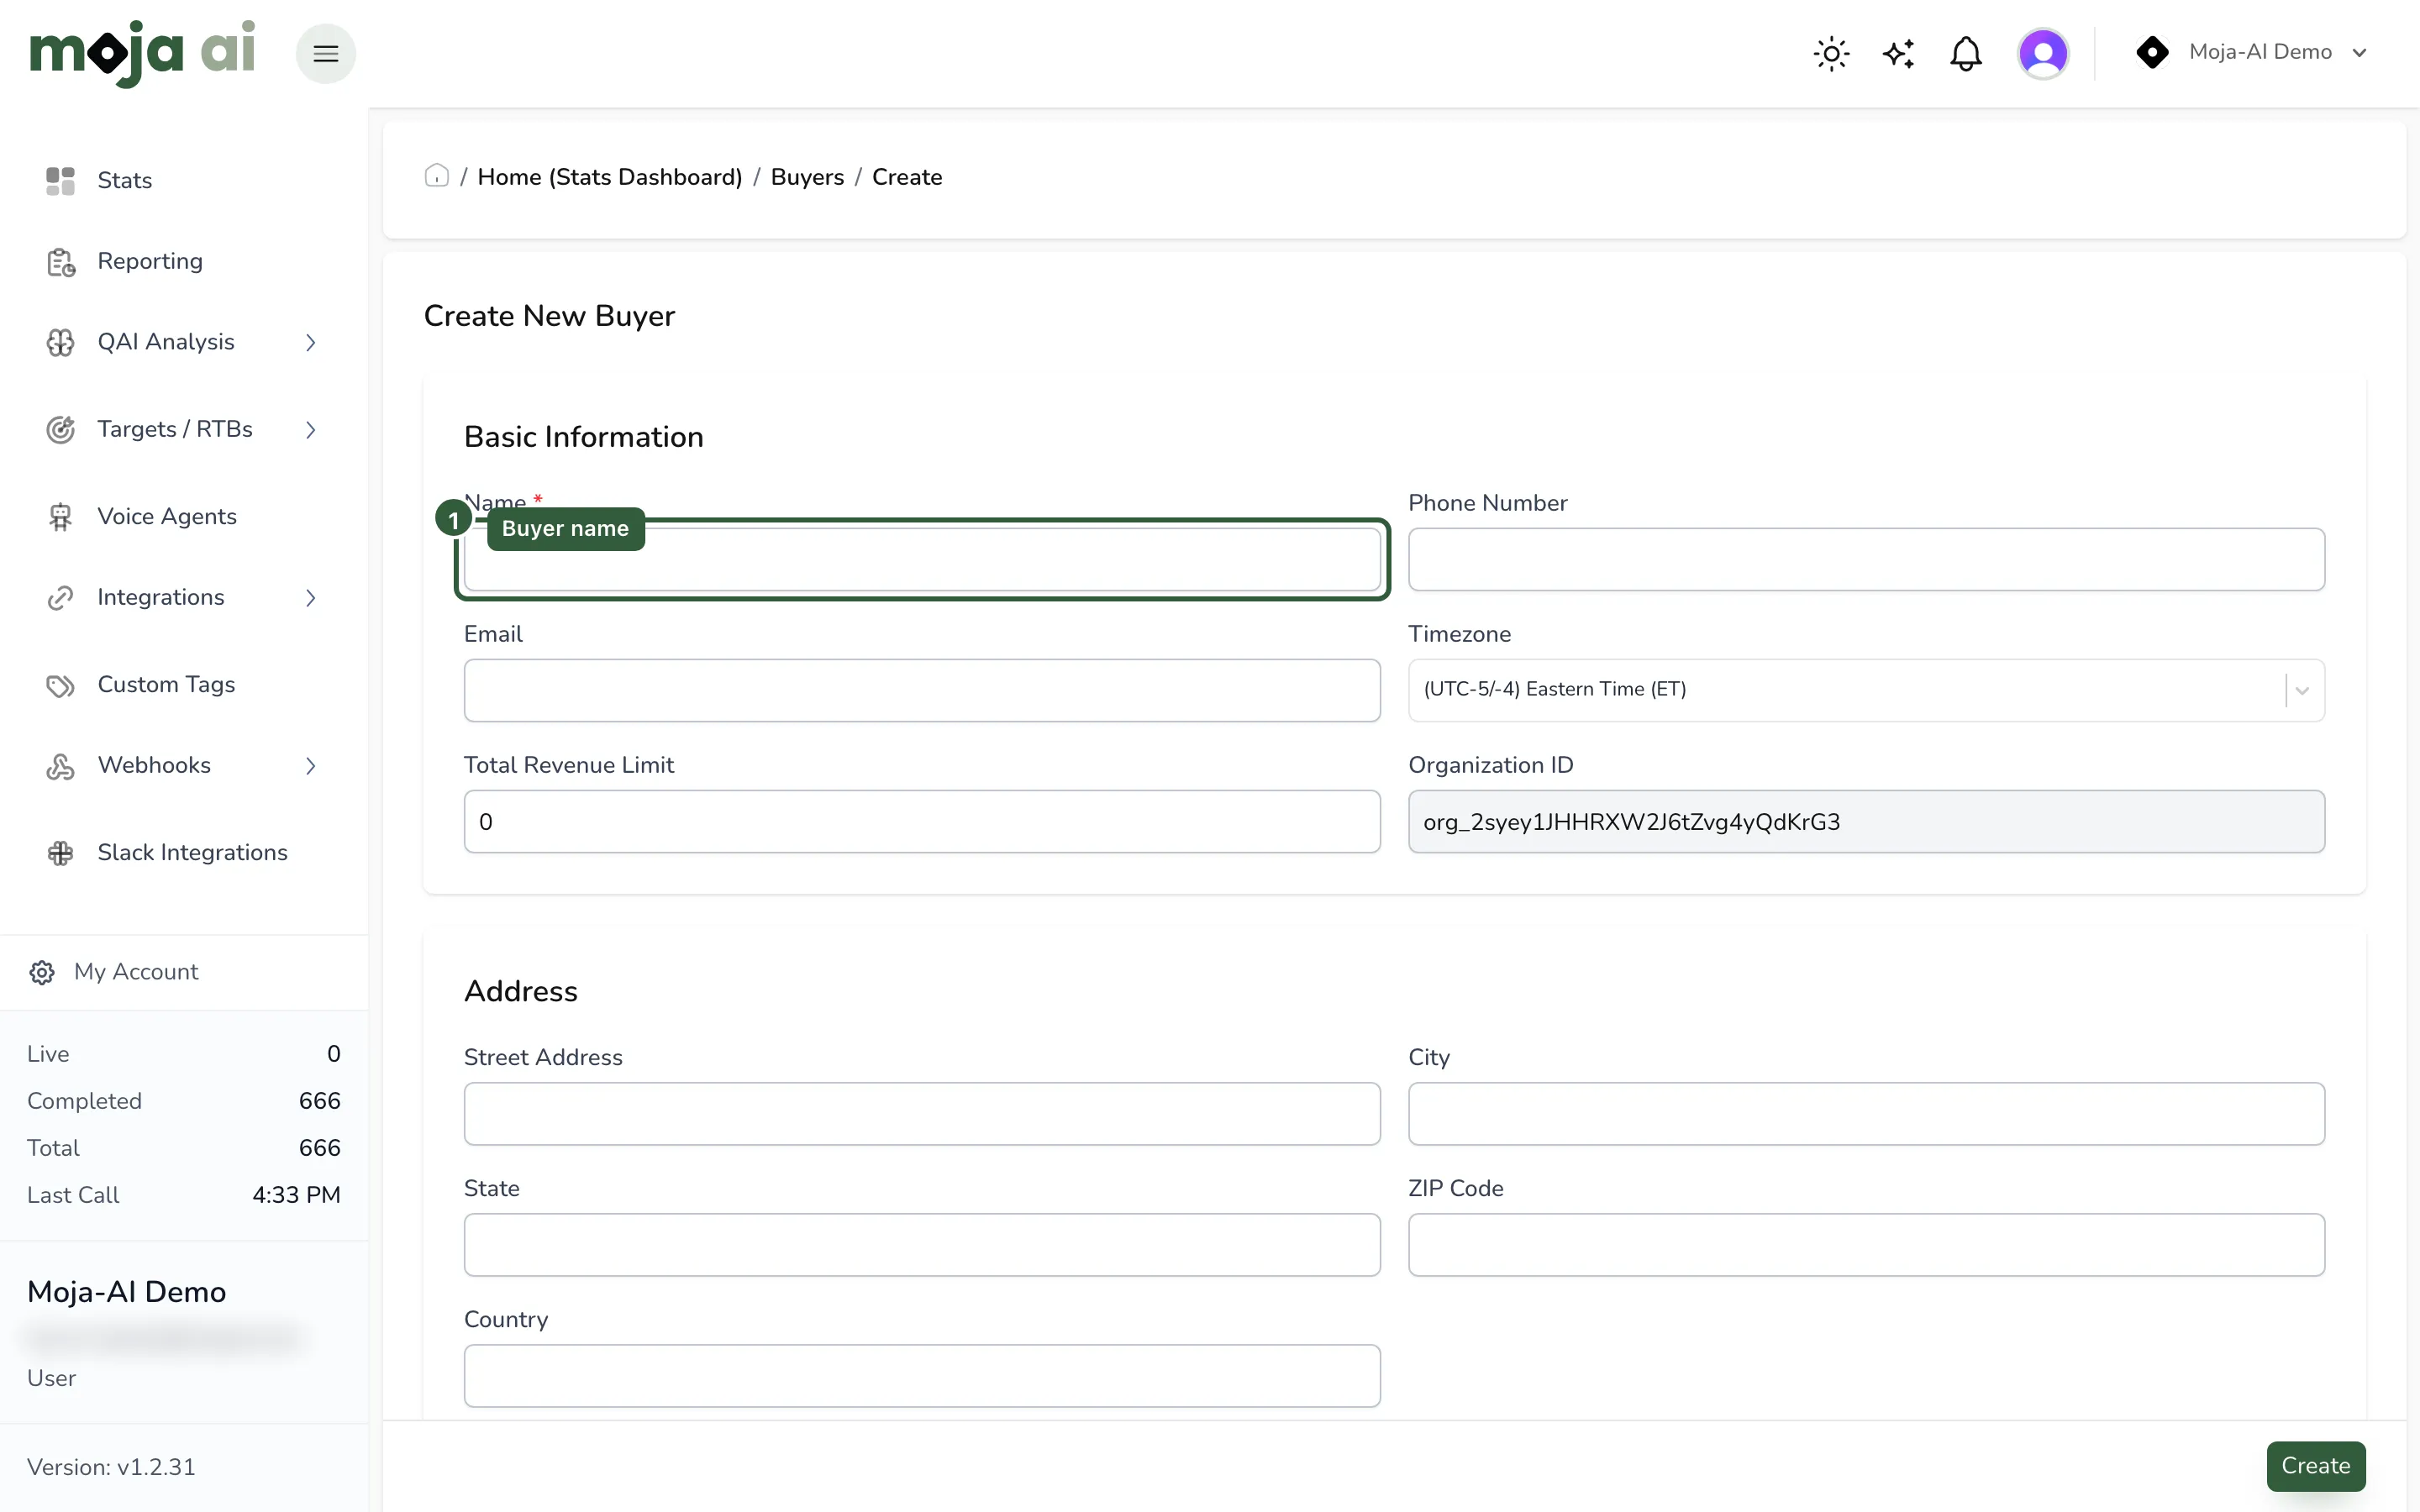
- Go to Buyers in the left navigation.
- Click Create New.
- Enter the buyer name, for example Test Buyer.
- Complete the optional fields that apply: phone number, email, revenue limits, active/inactive status, and call recording permissions.
- Click Create.
Expected result: the buyer is listed and active. A buyer left inactive will not accept calls later.
Step 3 — Create the target
Section titled “Step 3 — Create the target”The buyer is the commercial relationship; the target is the concrete destination a call is delivered to.
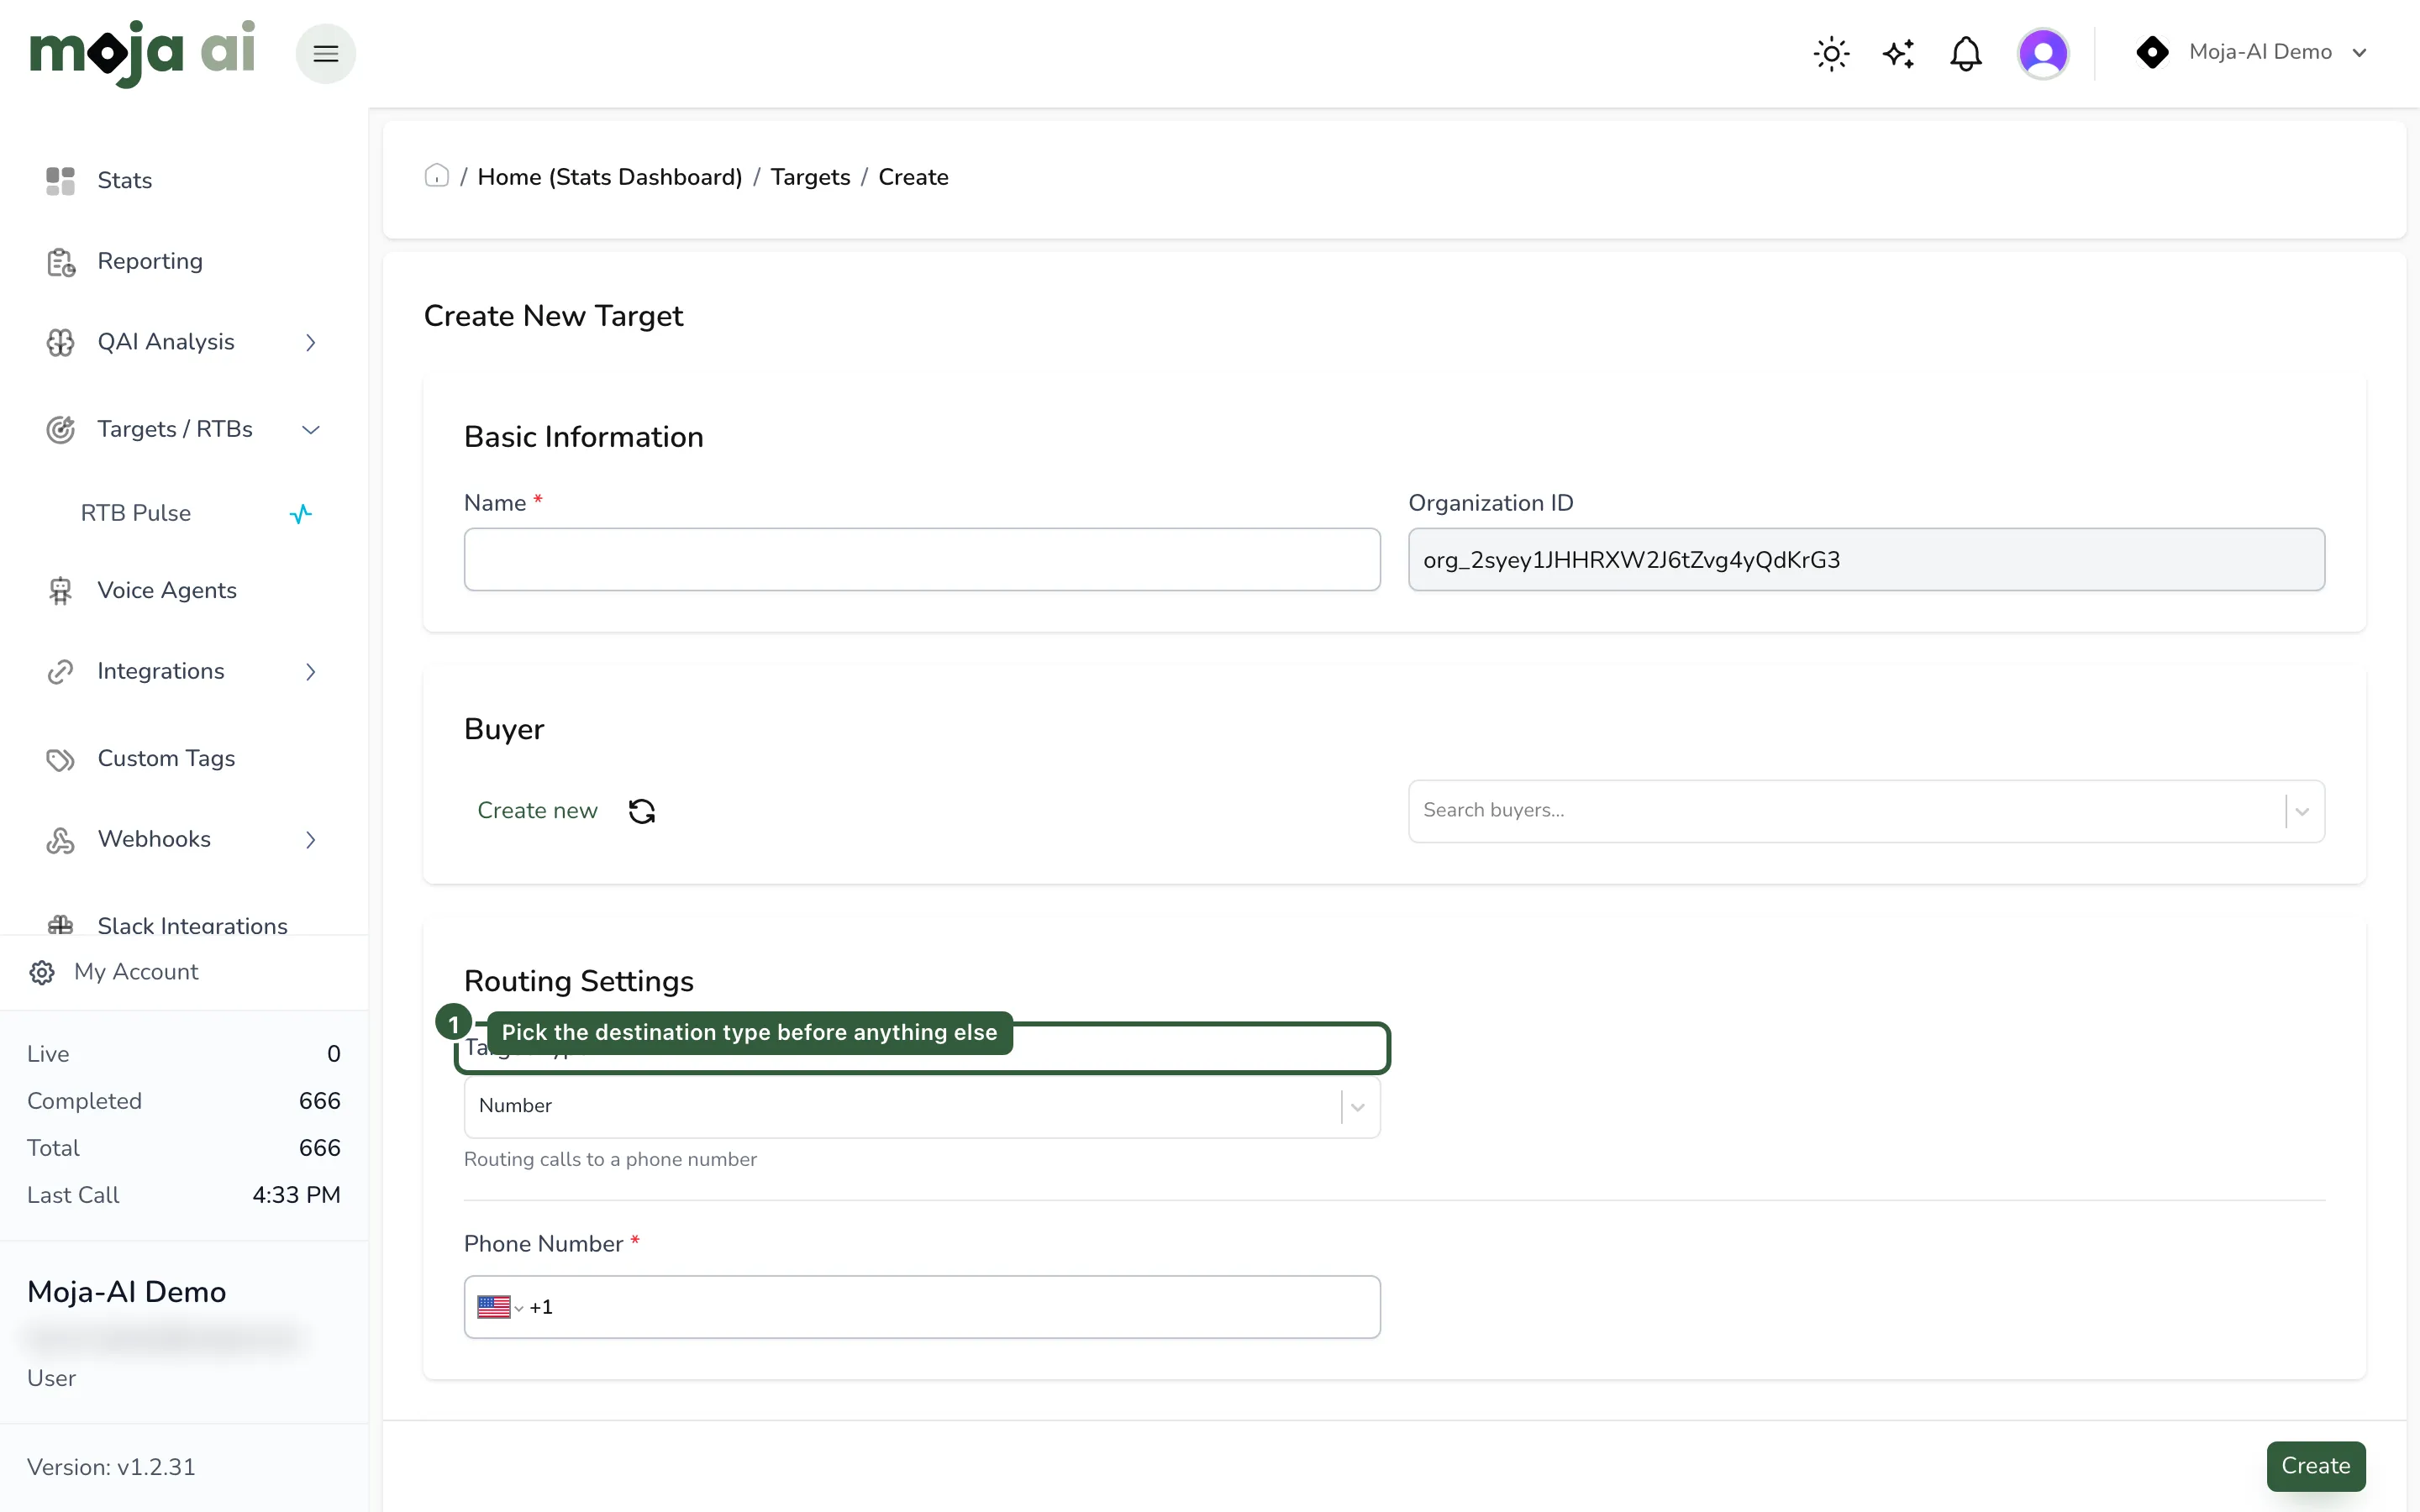
- Go to Targets / RTBs and select Targets.
- Click Create New.
- Enter a target name, for example First Target.
- Choose the buyer you created in step 2.
- Select the target type — Number Target for a phone number destination, SIP Target for SIP routing.
- For a number target, enter the destination phone number.
Expected result: the target is saved against the correct buyer, with a destination you can dial by hand to confirm it answers.
Step 4 — Set the target’s payout and conversion rule
Section titled “Step 4 — Set the target’s payout and conversion rule”This is the step that decides when you earn revenue, and it is the one most often set wrong.
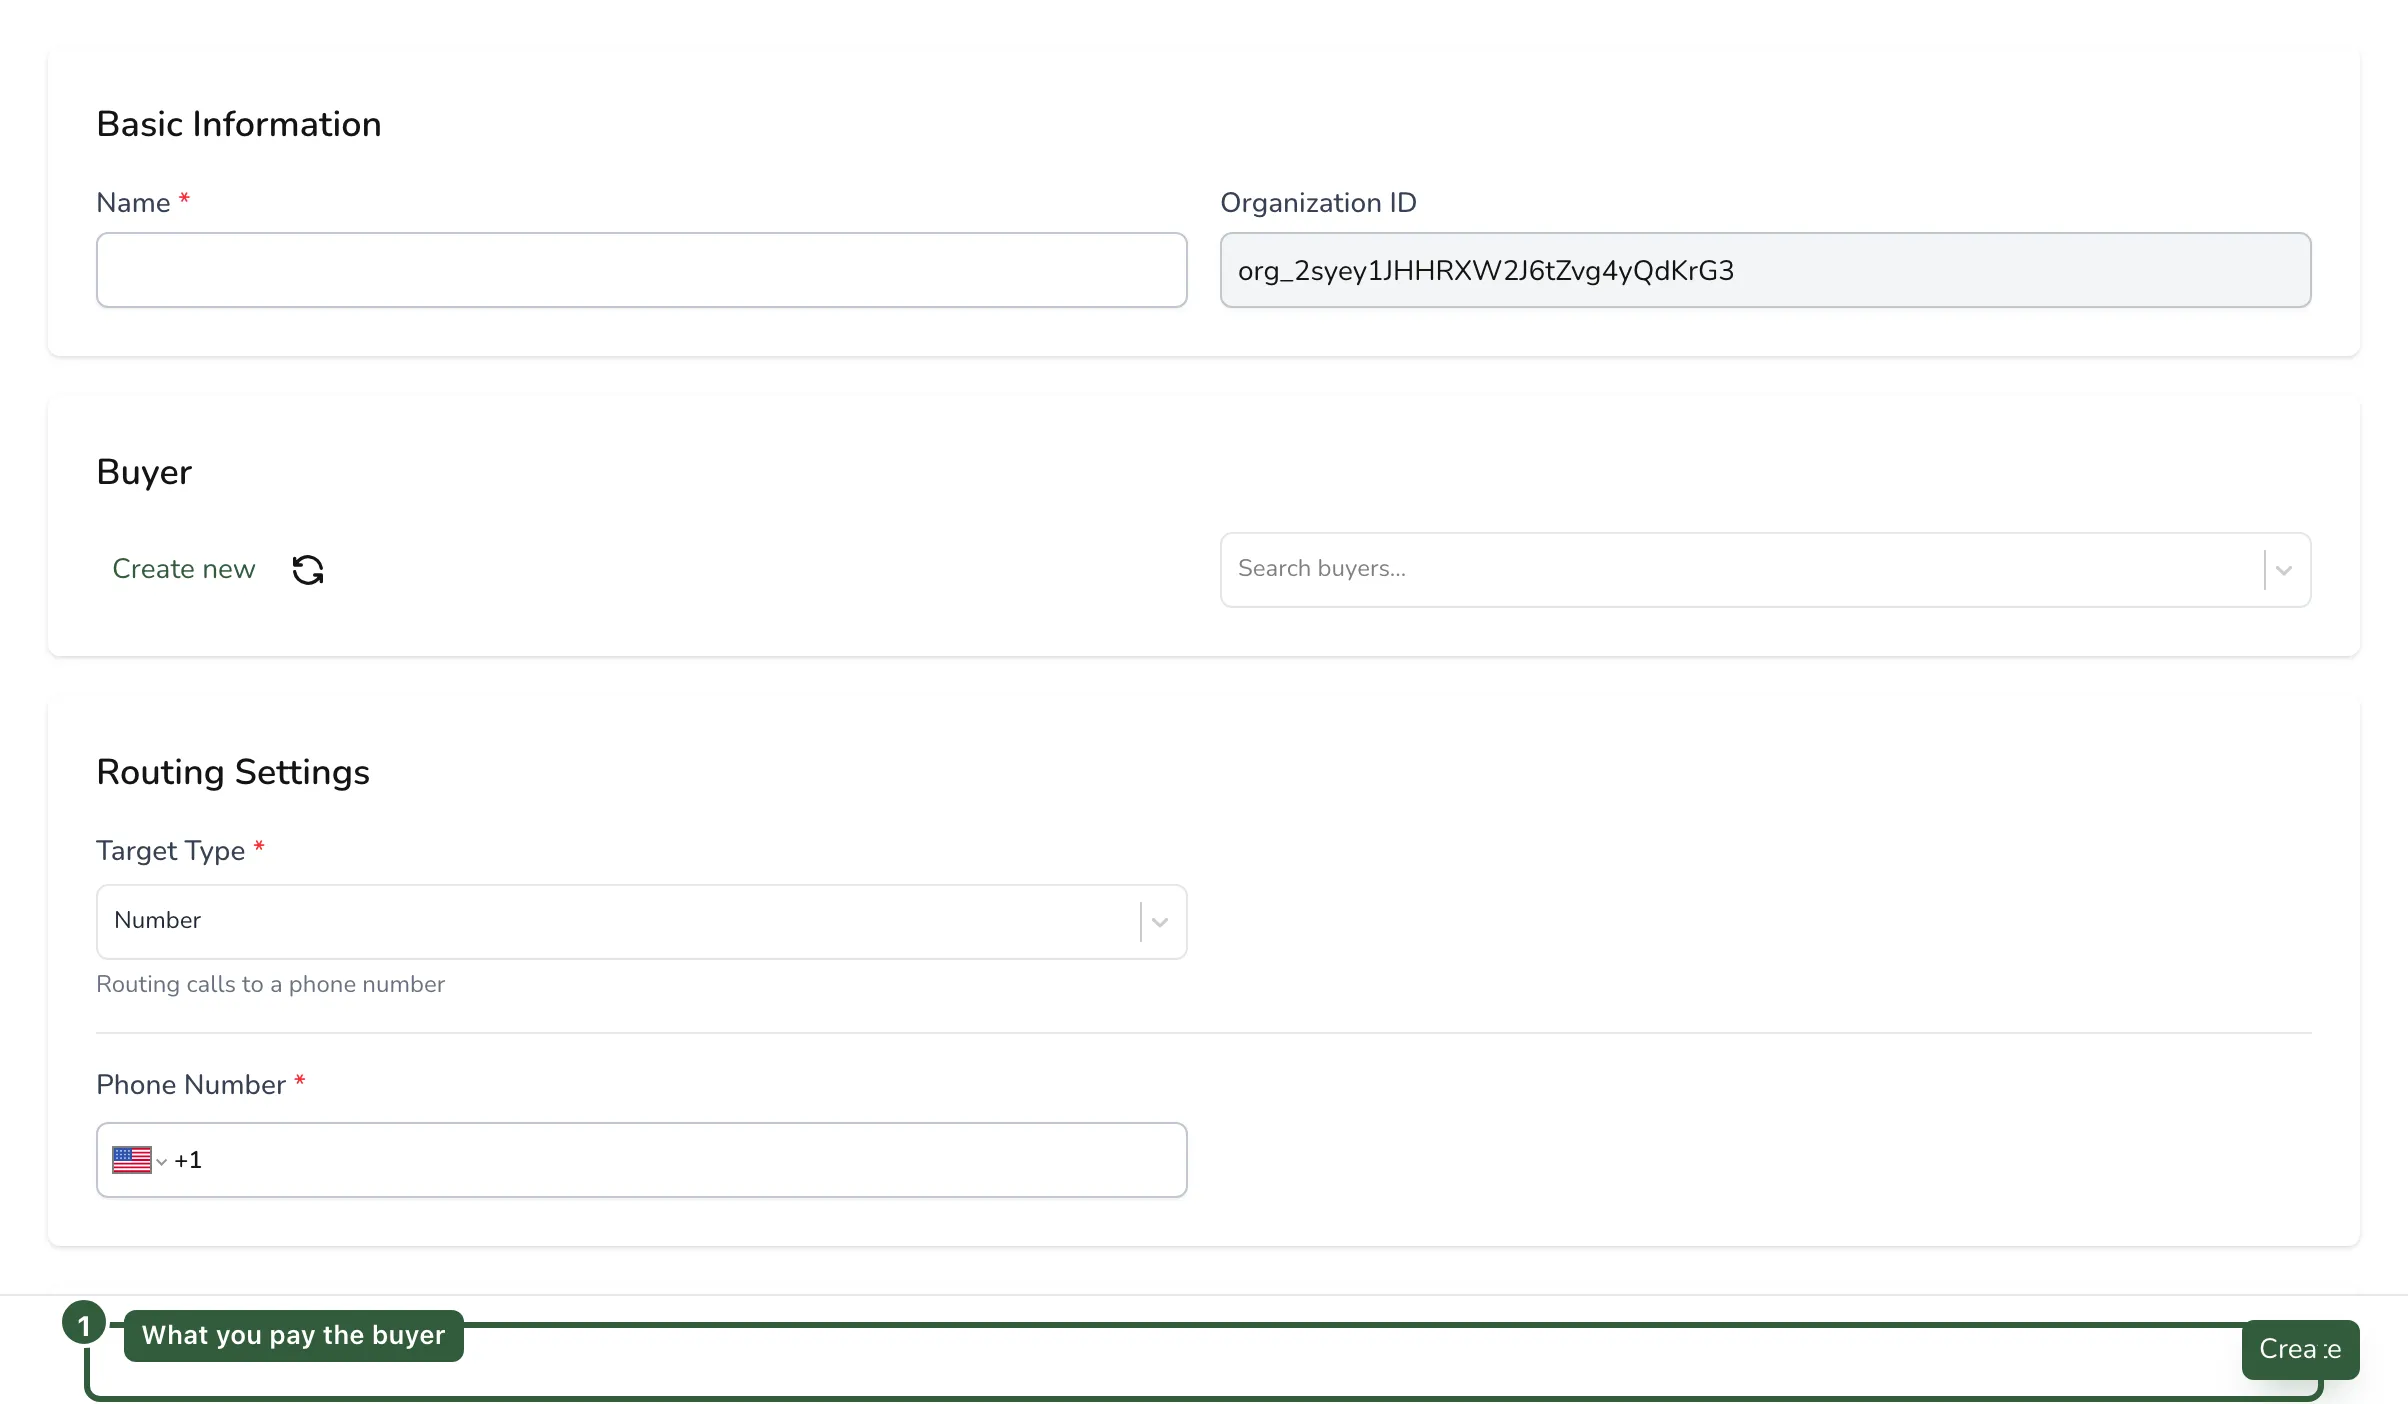
- Set the buyer payout amount to match your agreement.
- Choose the payout condition — for example call level, or length connected.
- Enter the conversion threshold, for example 90 seconds.
- Review the concurrency limit if the buyer can only take so many calls at once.
- Confirm the timezone.
- Confirm the target status is active.
- Decide whether call recording is allowed for this target.
- Save the target.
Expected result: the target shows as open and available. If your conversion rule is 90 seconds, a 40-second call will connect and still produce no revenue — that is correct behaviour, not a fault.
Step 5 — Set availability and duplicate rules
Section titled “Step 5 — Set availability and duplicate rules”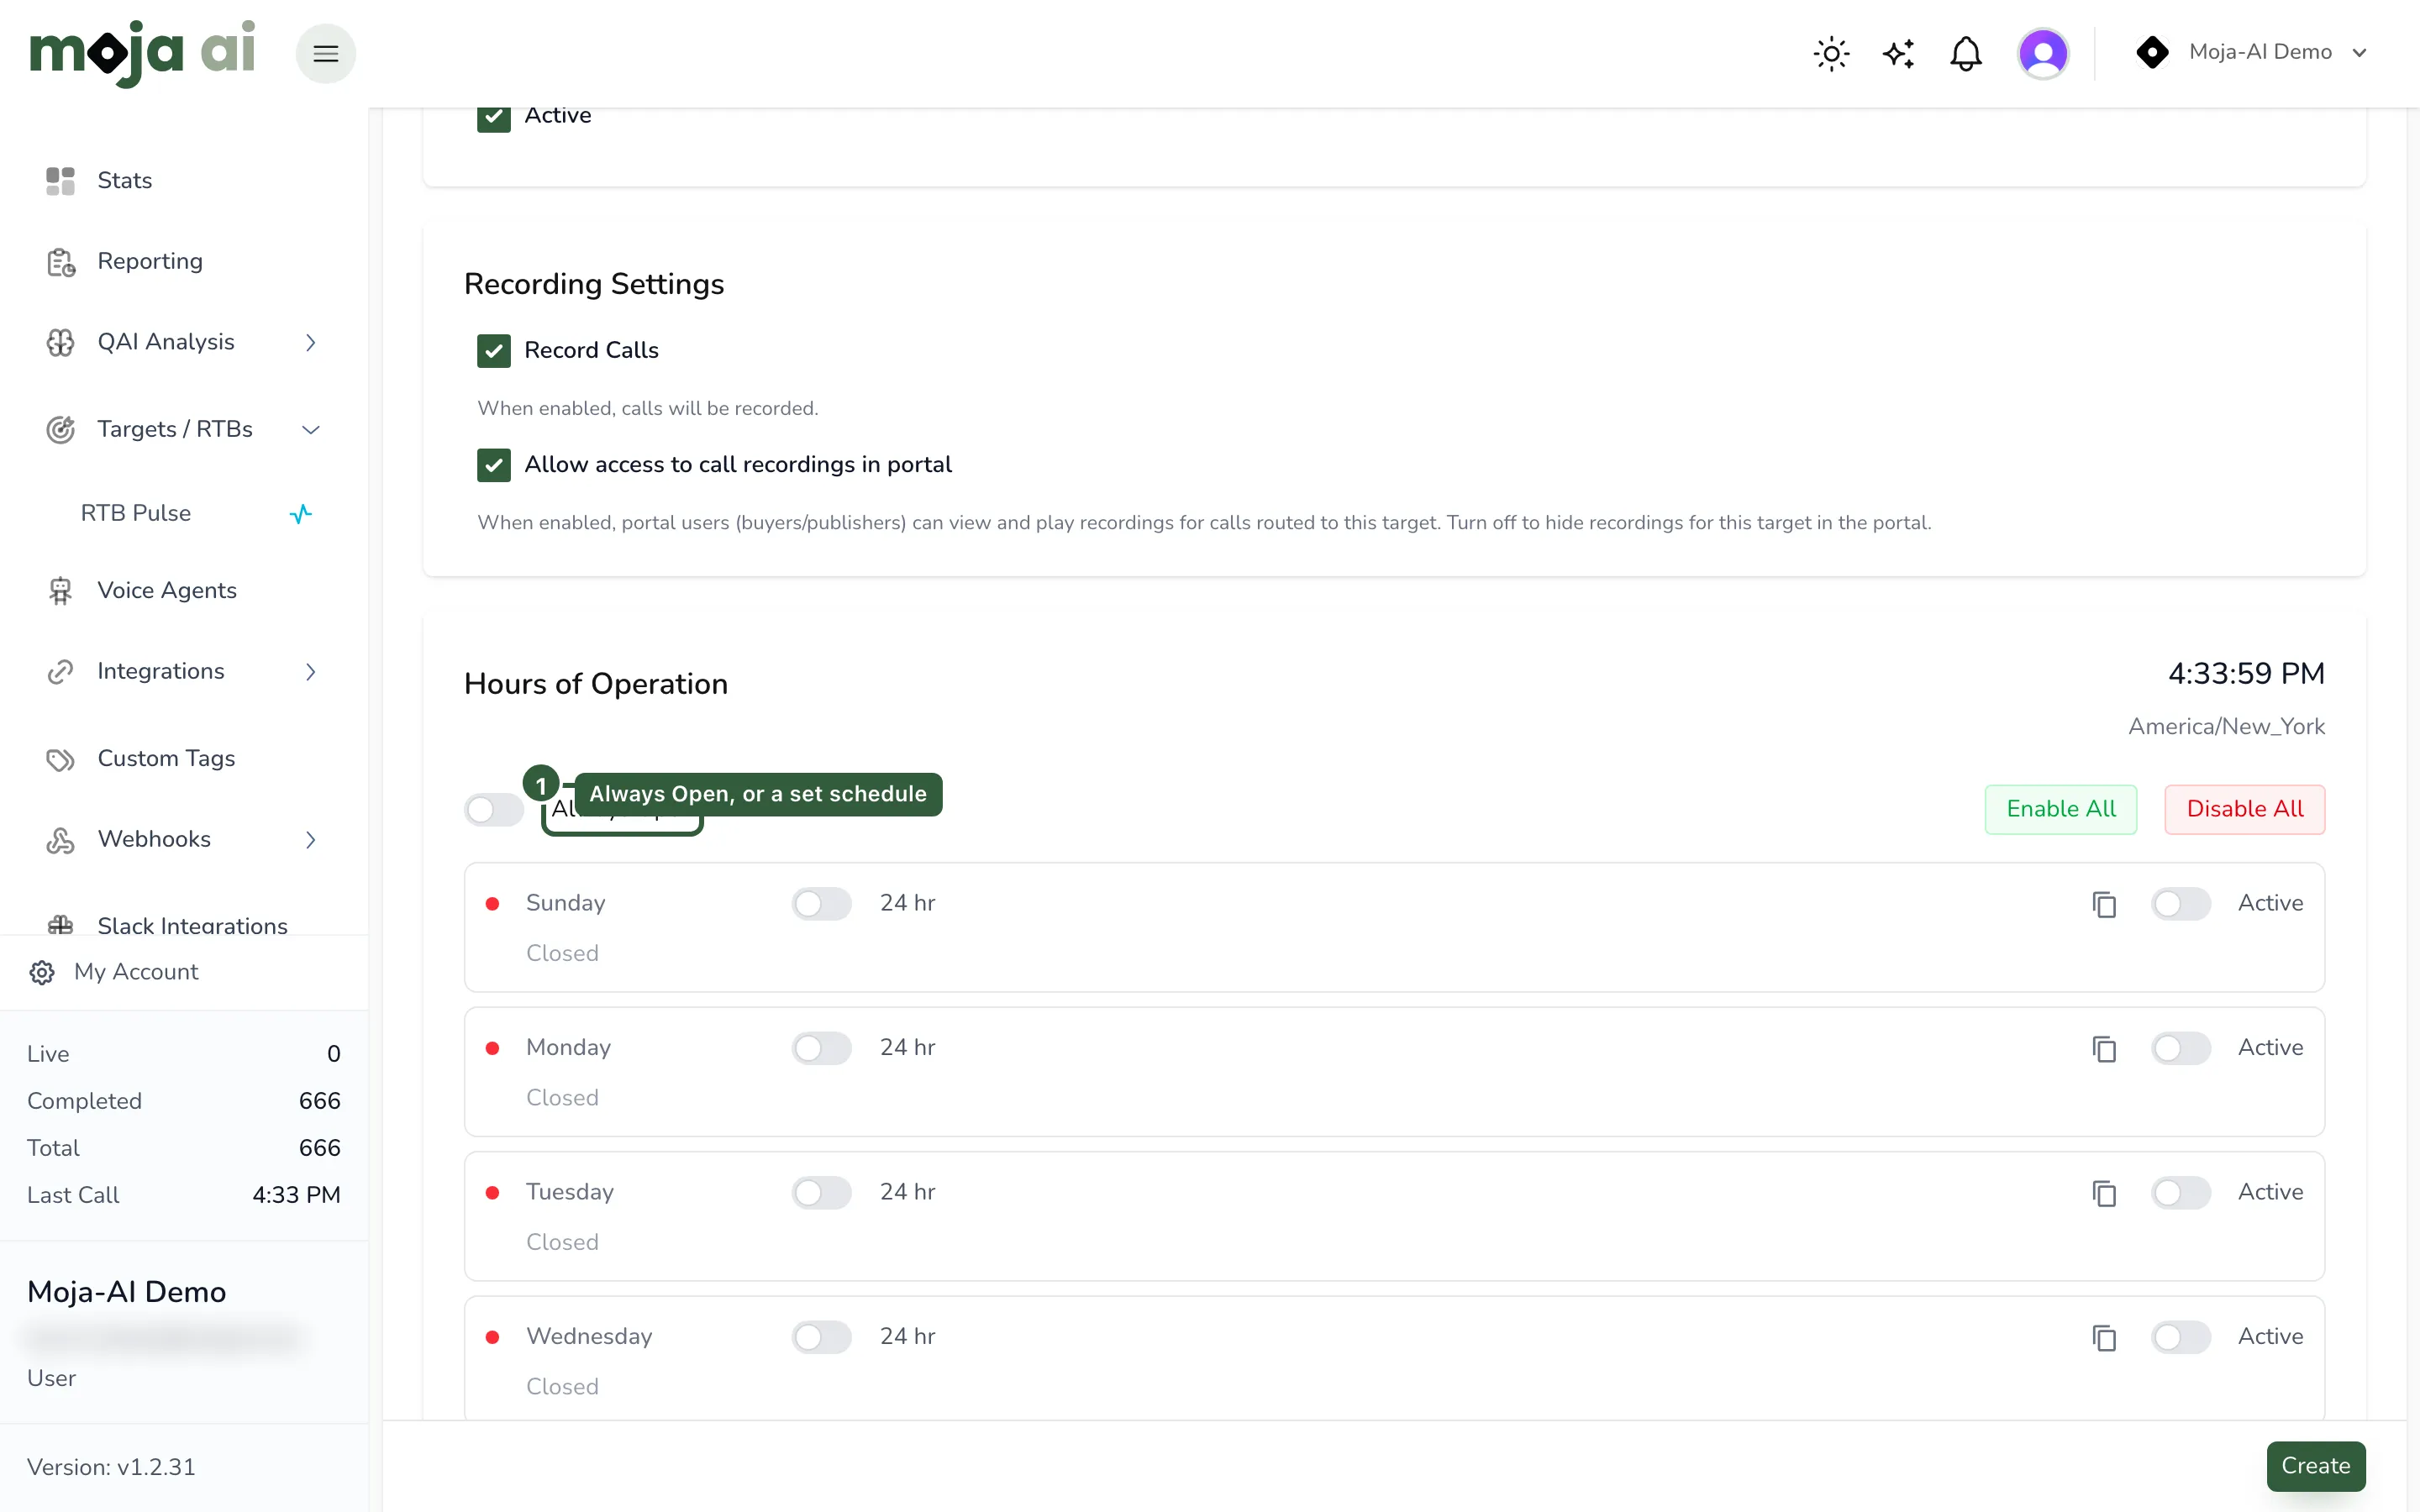
- Decide whether the target is Always Open or available only during set hours.
- For scheduled availability, enable the days you want, add a start and end time, and use the copy-schedule control to apply the same window to other days.
- Configure duplicate call handling if your buyer does not pay for repeat conversions. Define the rule by caller or by target.
- Add advanced filtering only if you genuinely need to filter by state, publisher, or ZIP code.
Expected result: the target is open during the hours you intend to test in. A closed schedule is the most common reason a first test call rings and drops.
Step 6 — Review optional target integrations and caps
Section titled “Step 6 — Review optional target integrations and caps”Skip this step entirely on a first campaign unless the buyer requires an availability check.
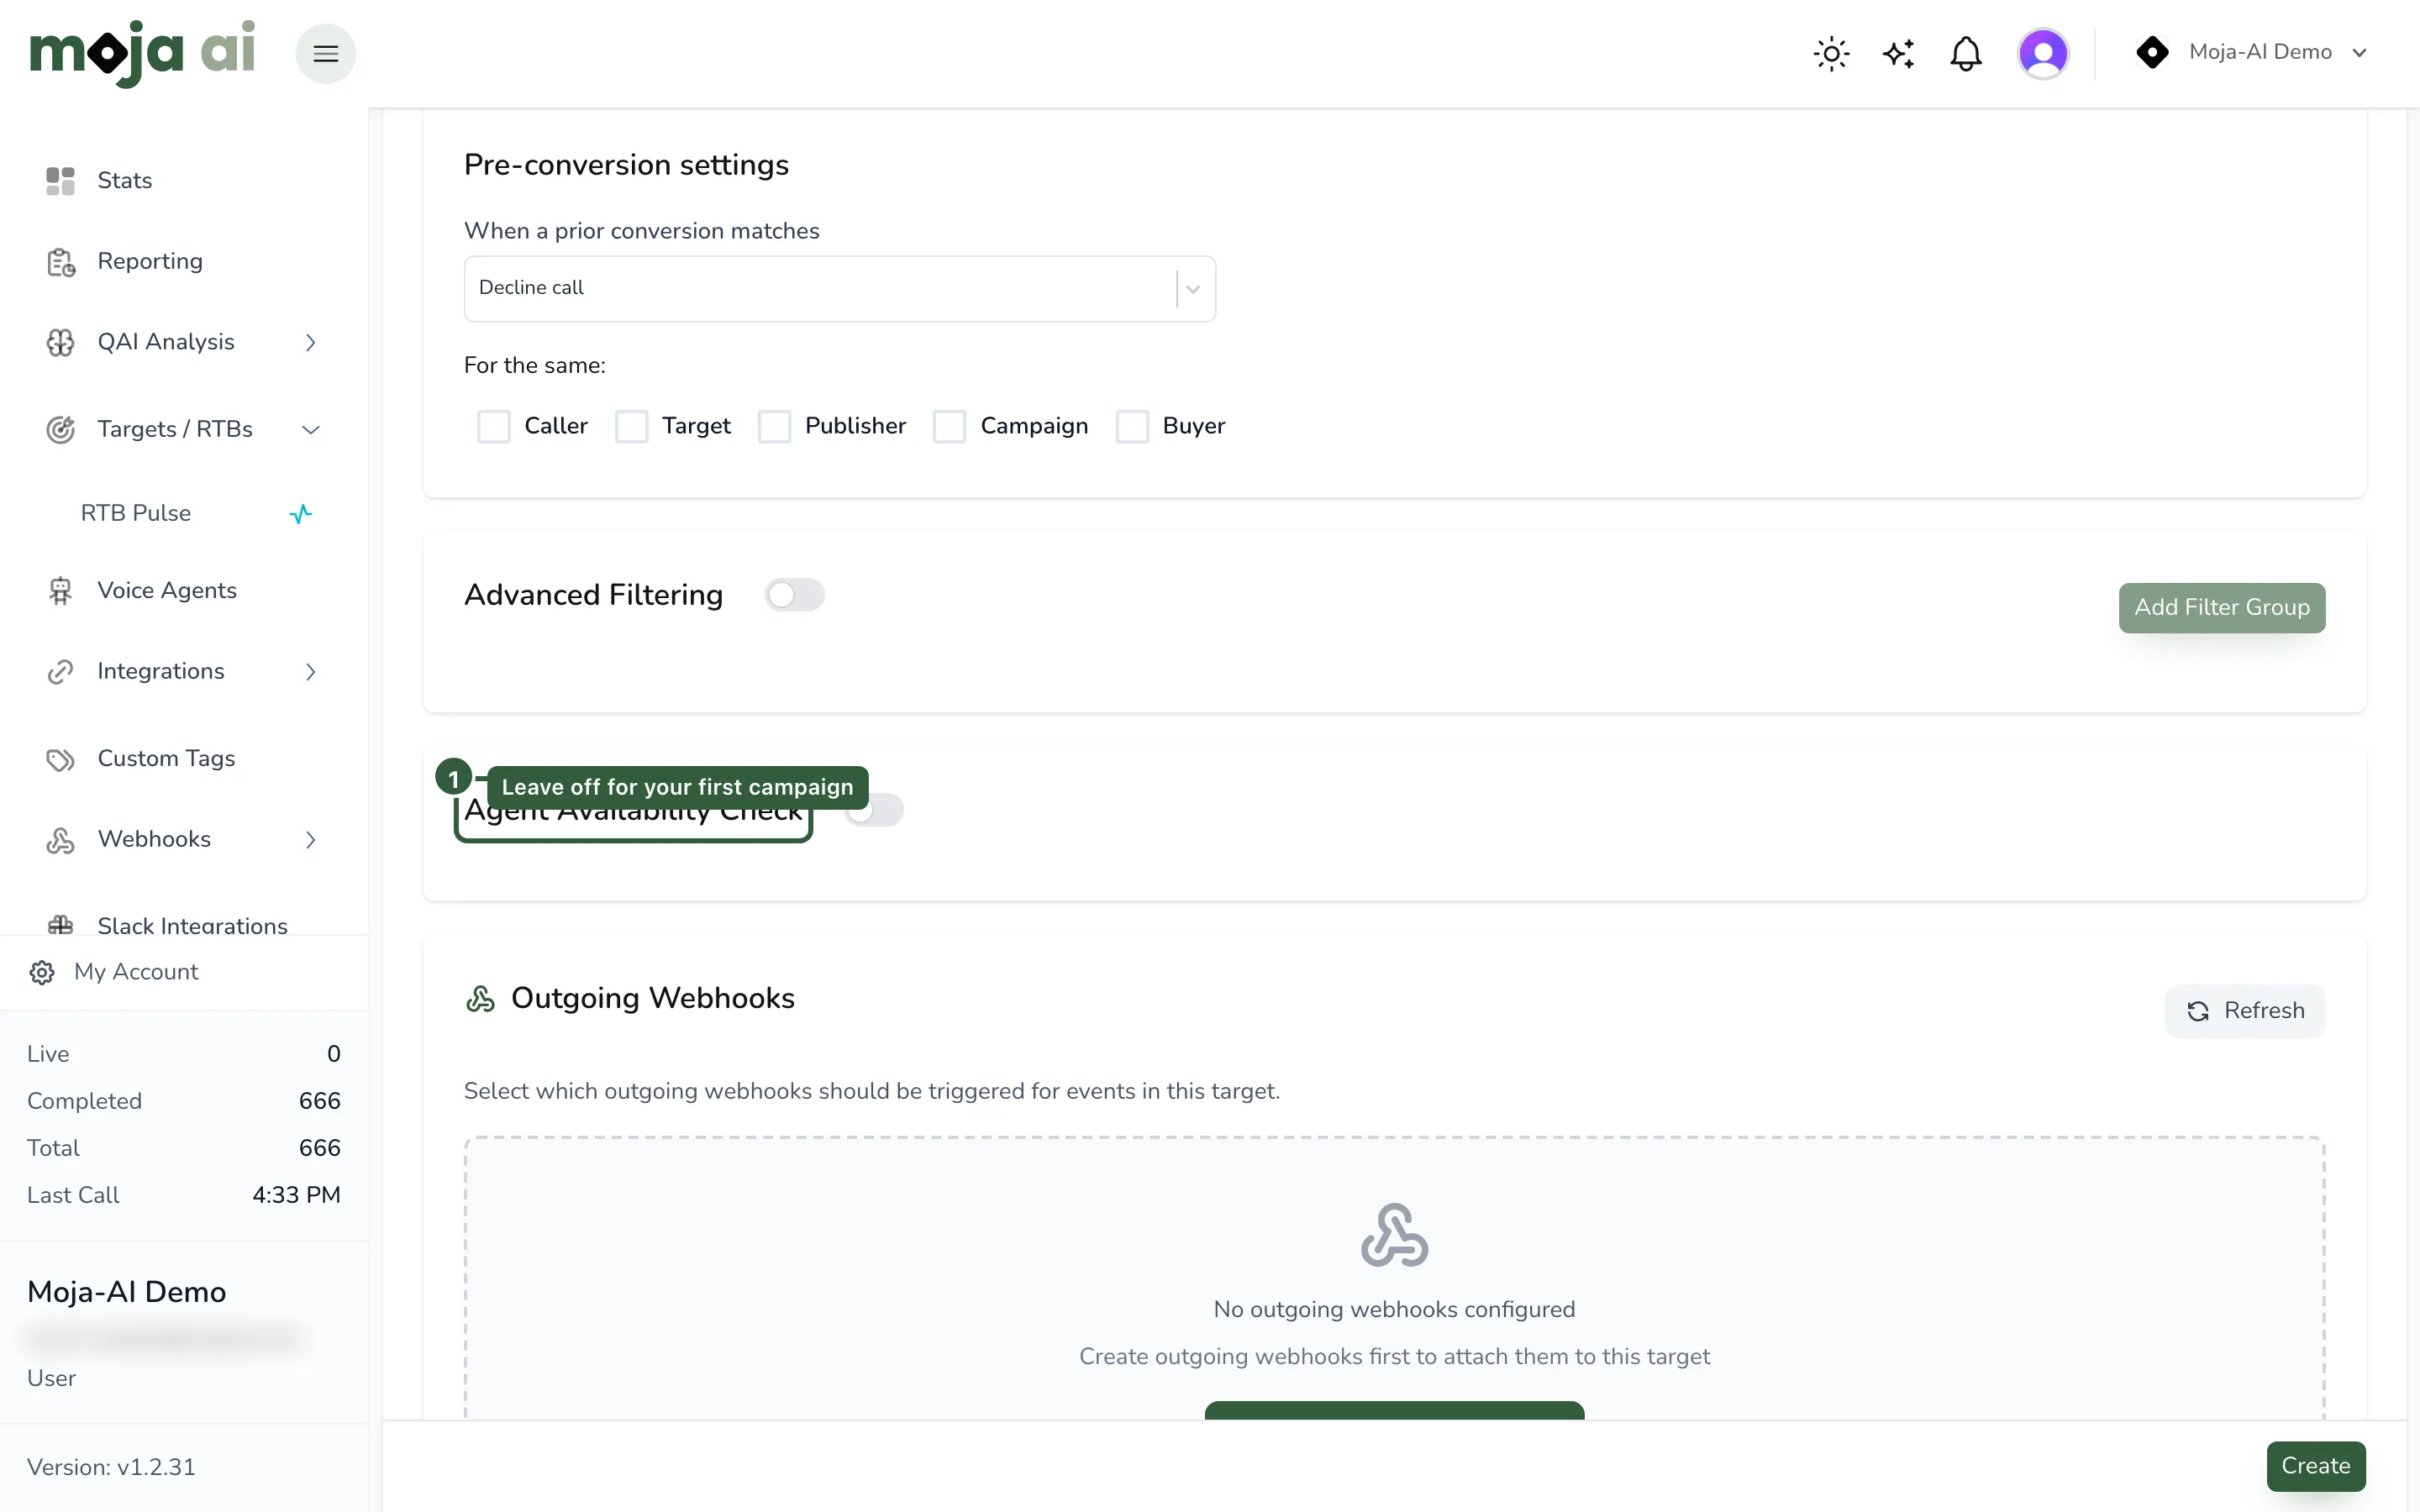
- If required, configure Agent Availability Check with the buyer’s API endpoint.
- Choose the request type, GET or POST.
- Define the expected response condition, for example availability greater than zero.
- Use Advanced CAP settings only if you need to limit connected calls, converted calls, raw calls, or revenue.
- Save the target.
Expected result: the target saves without validation errors. If you configured an availability check, test the connection before sending traffic — a failing check silently removes the target from routing.
Step 7 — Create the routing plan
Section titled “Step 7 — Create the routing plan”The routing plan is the ordered list of destinations a call is offered to.
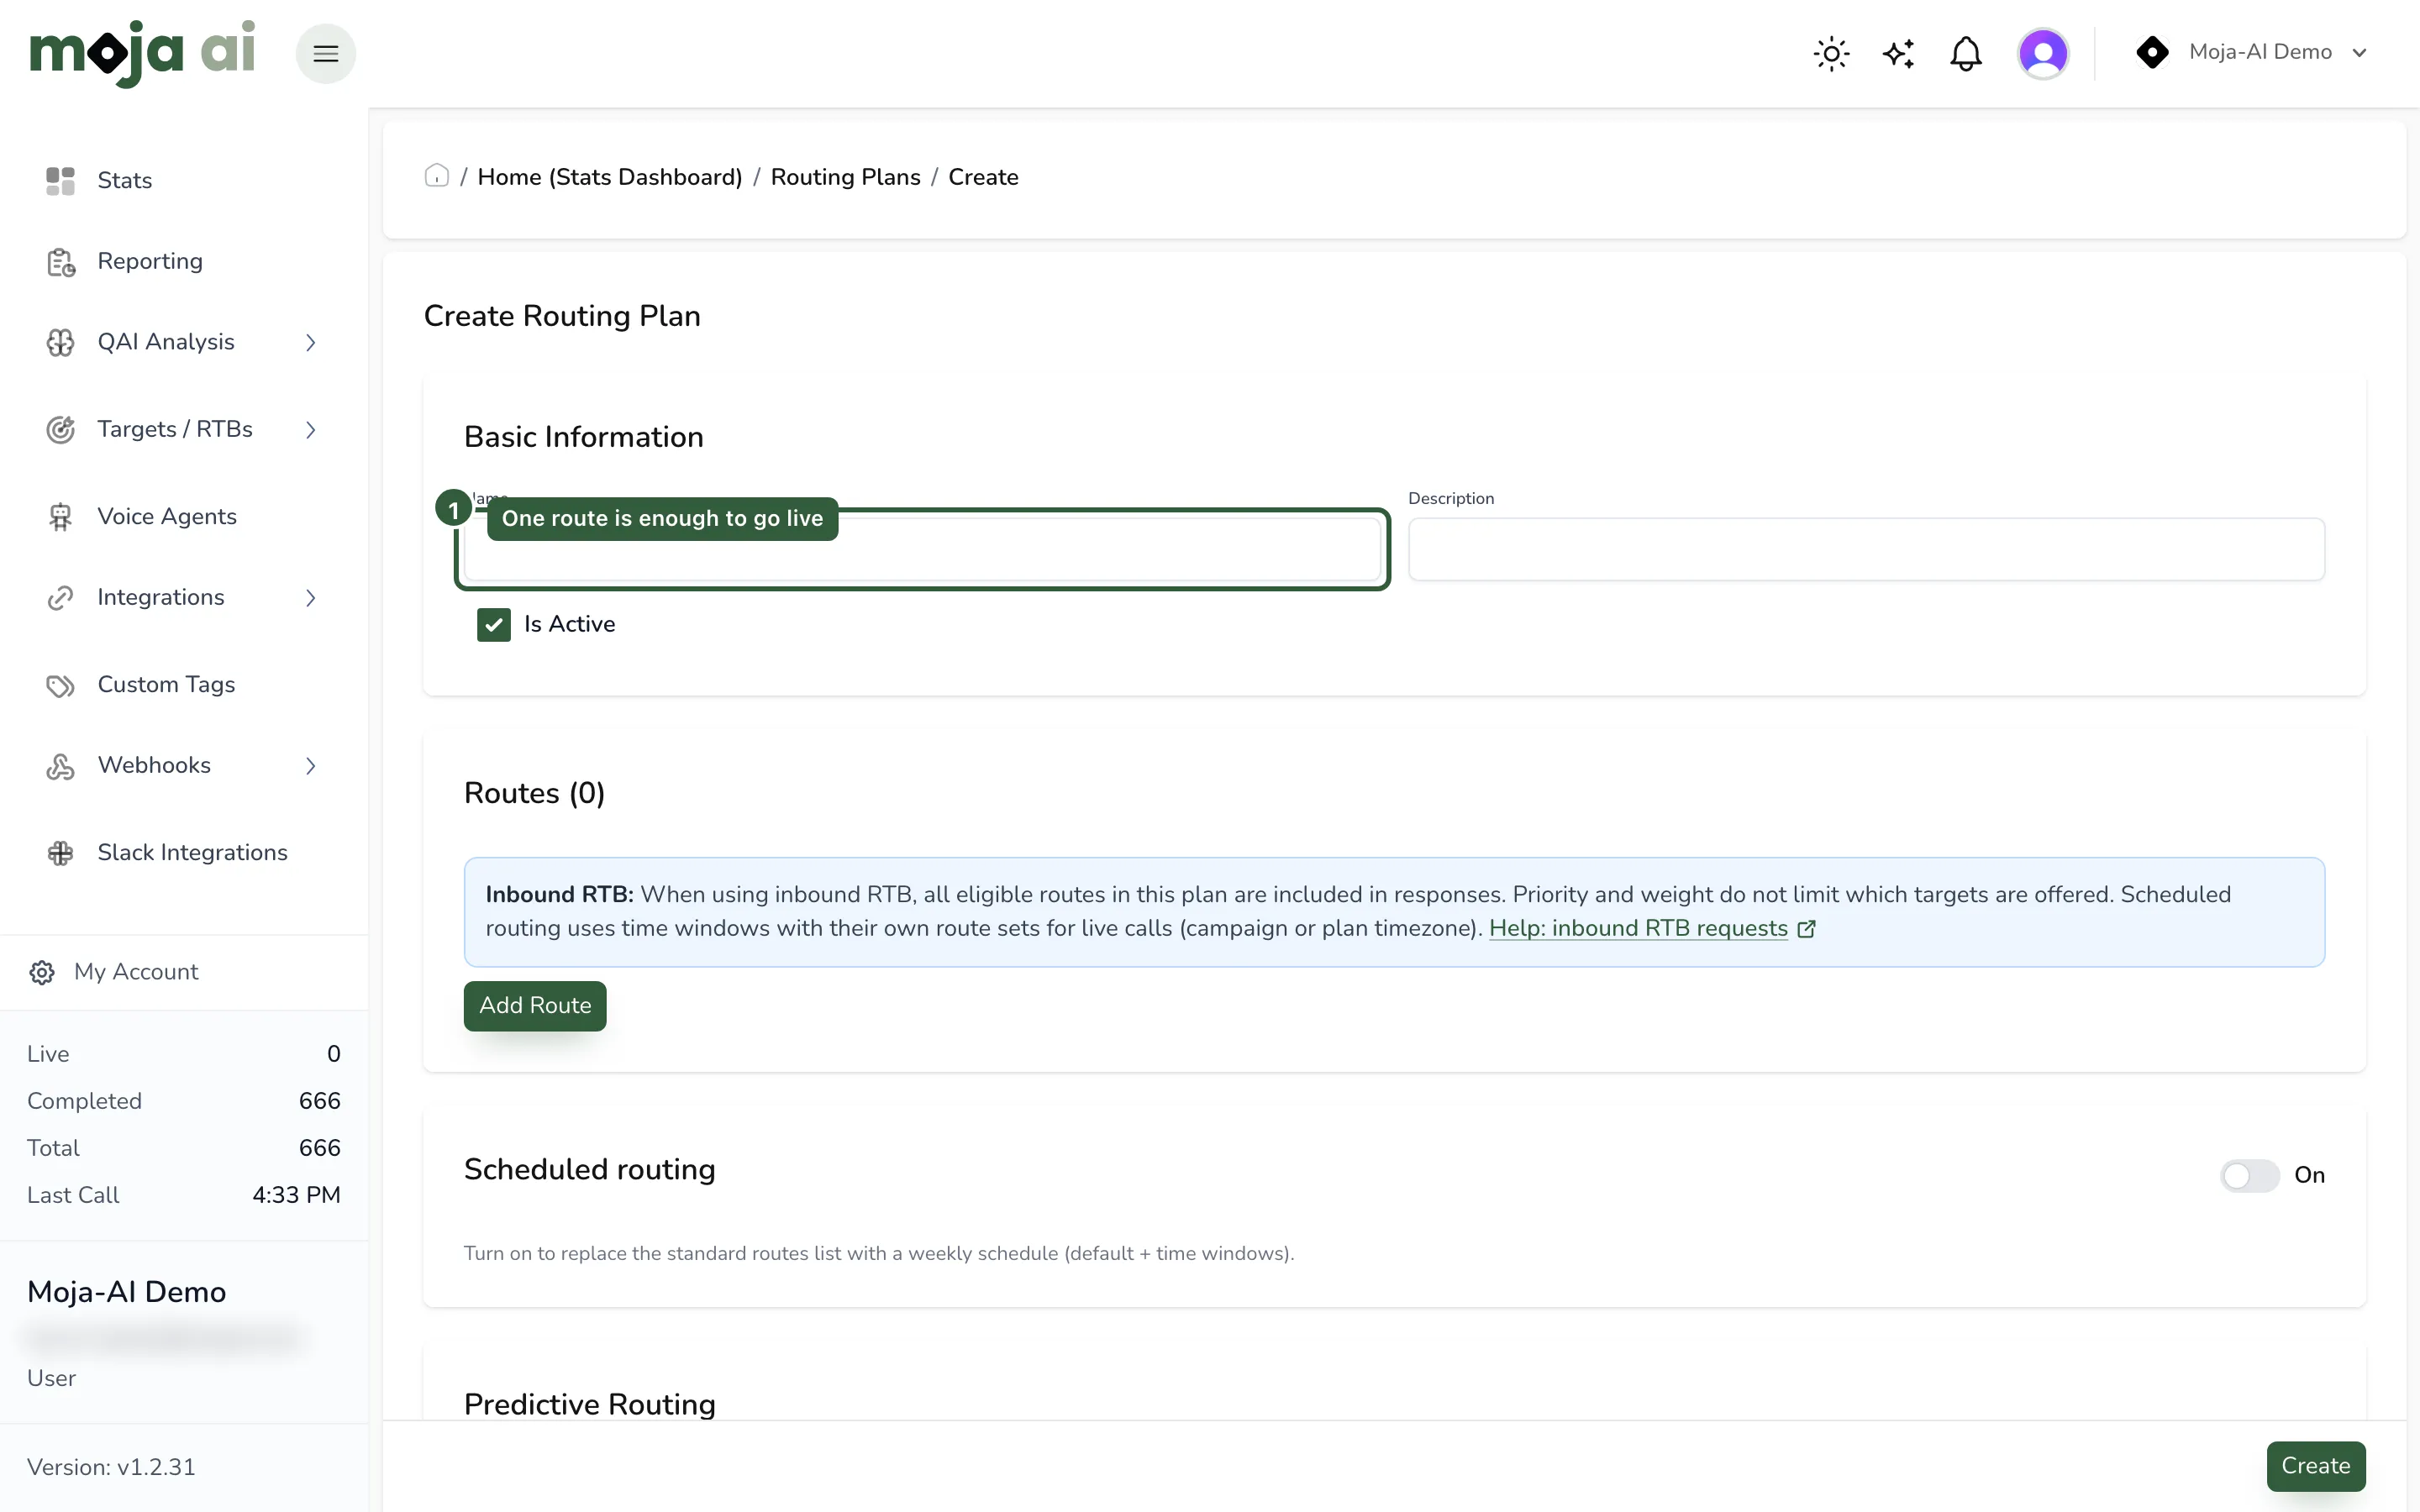
- Go to Routing Plan in the left navigation.
- Click Create New.
- Name it, for example Test Routing Plan.
- In the route section, select the target from step 3.
- Confirm the target shows as open and available.
- Save the routing plan.
Expected result: the plan lists one target, shown as open. If it shows closed, go back to step 5 — the schedule or the active toggle is wrong.
Step 8 — Create the campaign and attach the routing plan
Section titled “Step 8 — Create the campaign and attach the routing plan”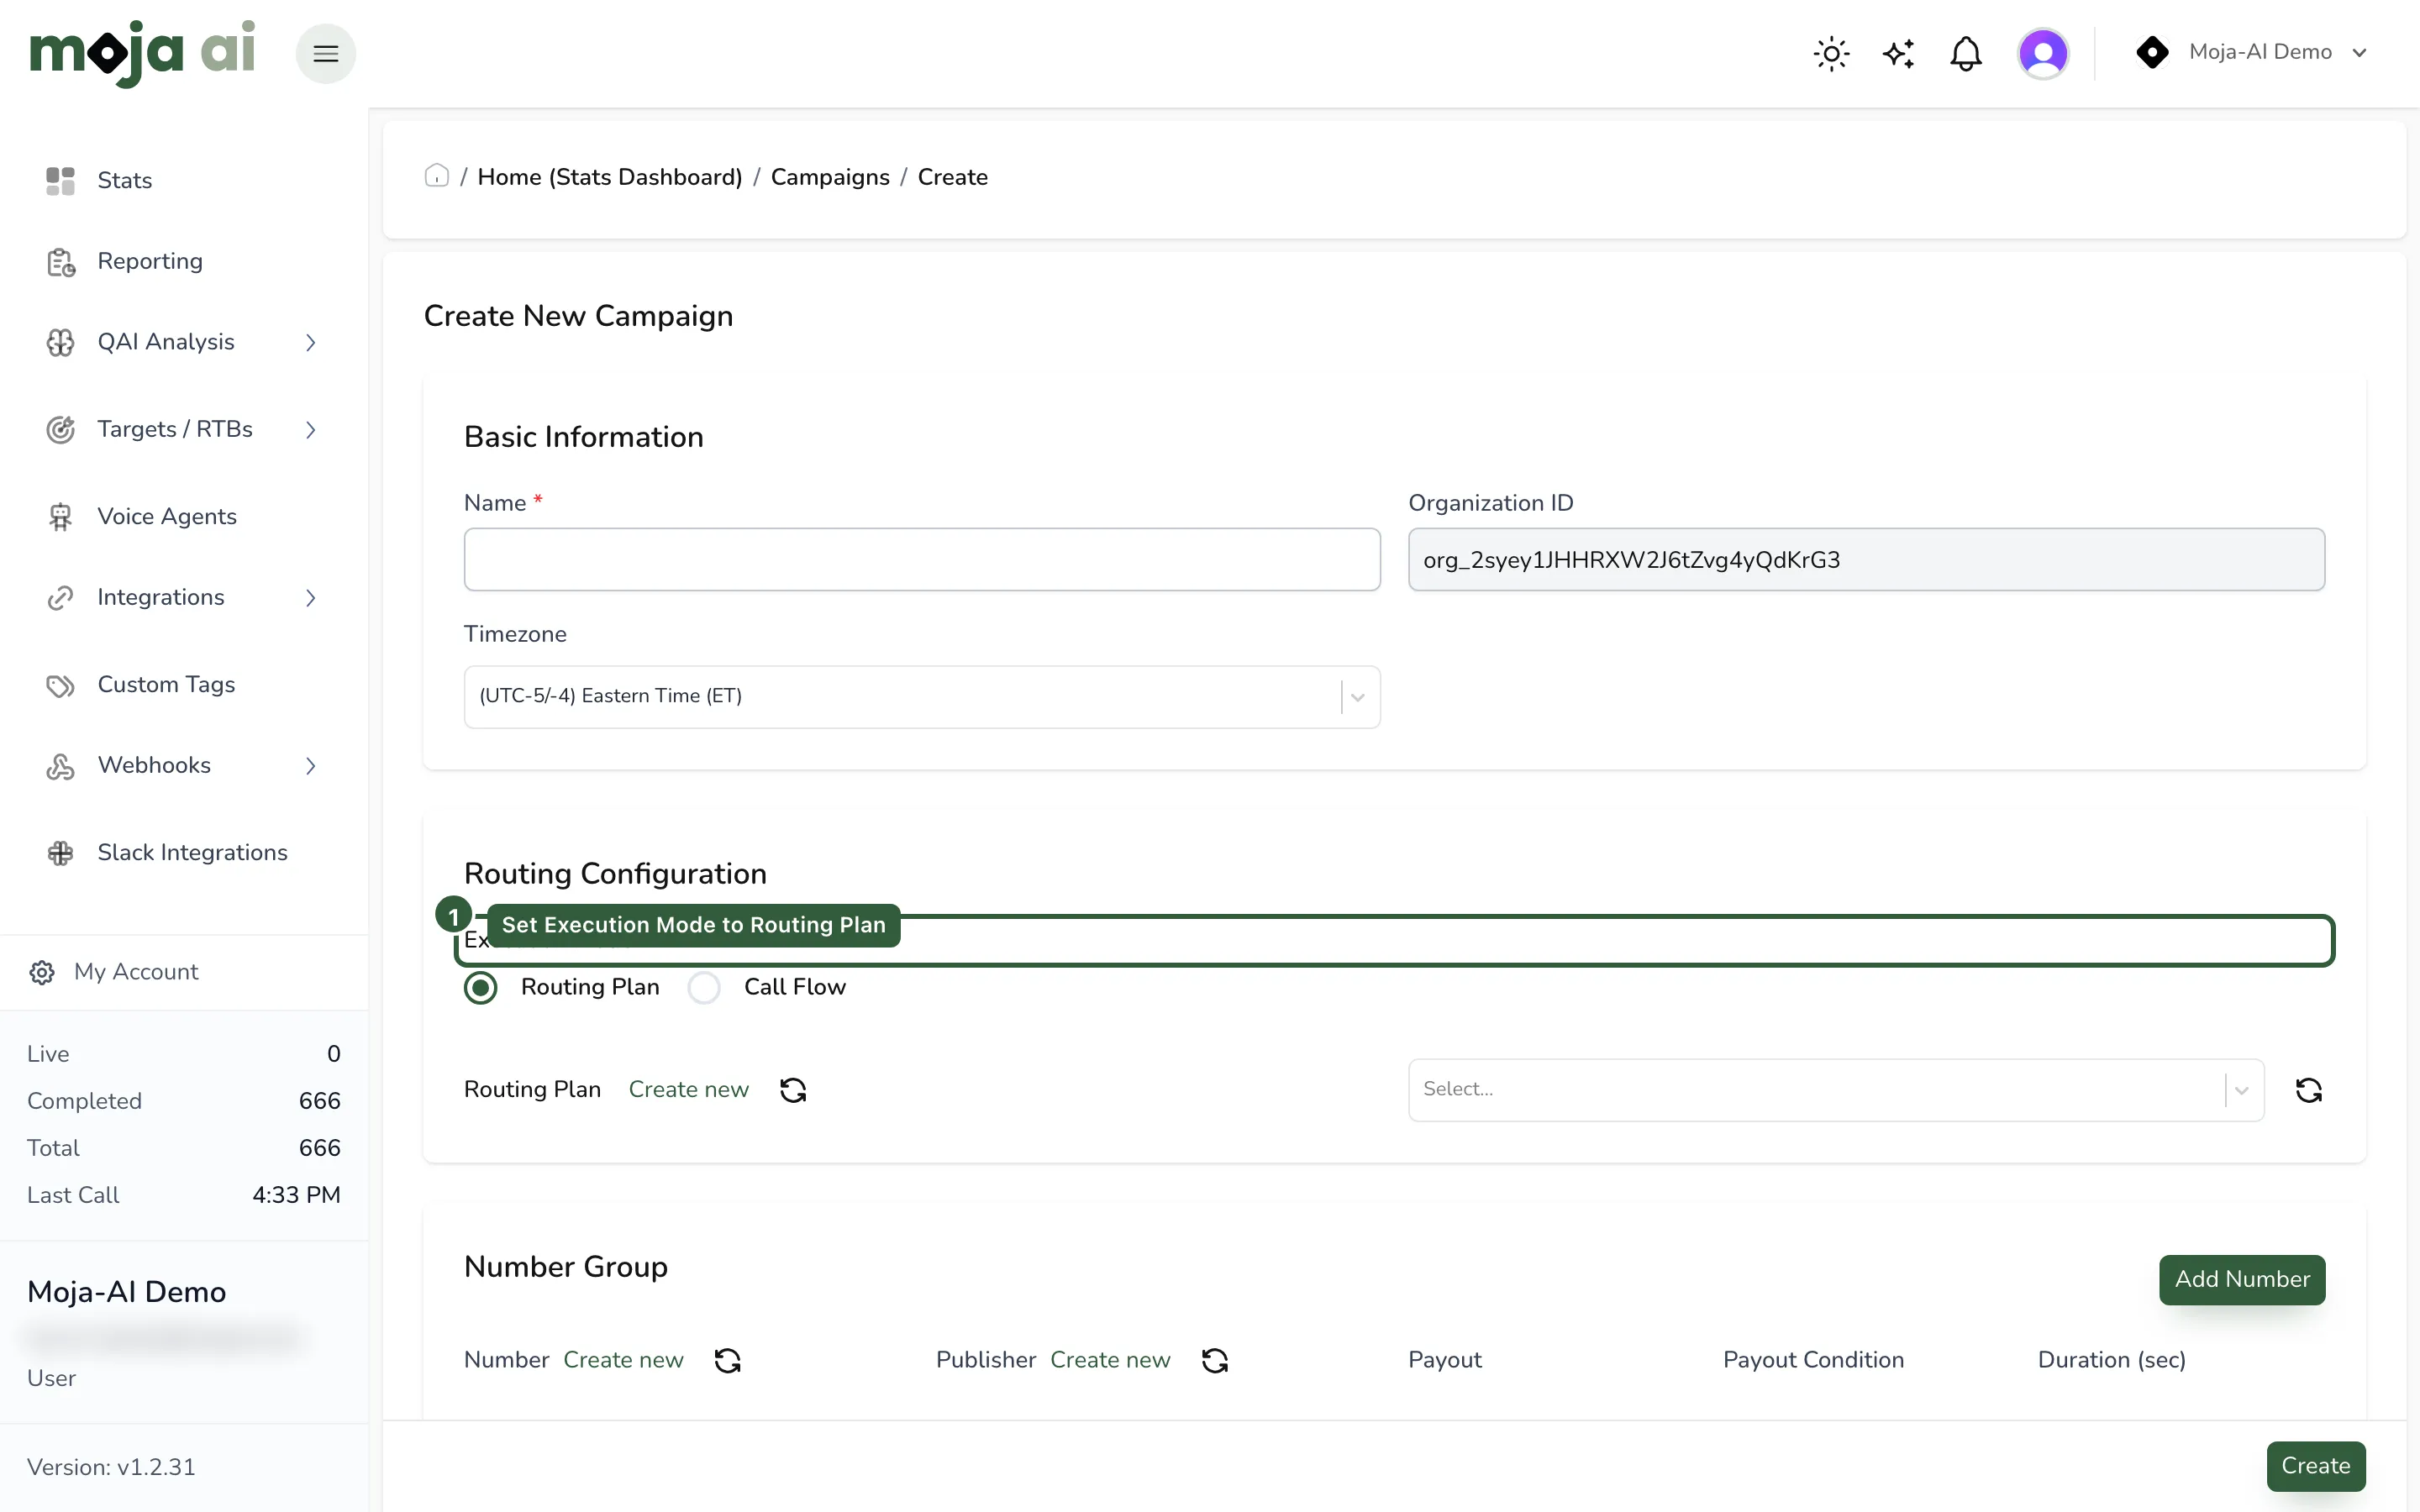
- Go to Campaigns and click Create New.
- Enter the campaign name.
- Confirm or set the timezone. Campaign timezone drives schedules and caps, so a mismatch here surfaces later as “calls only fail in the evening.”
- Set Execution Mode to Routing Plan.
- Select the routing plan from step 7.
- Confirm the routing configuration points at the target you expect.
Expected result: the campaign shows the routing plan and, through it, your target.
Step 9 — Add a tracking number
Section titled “Step 9 — Add a tracking number”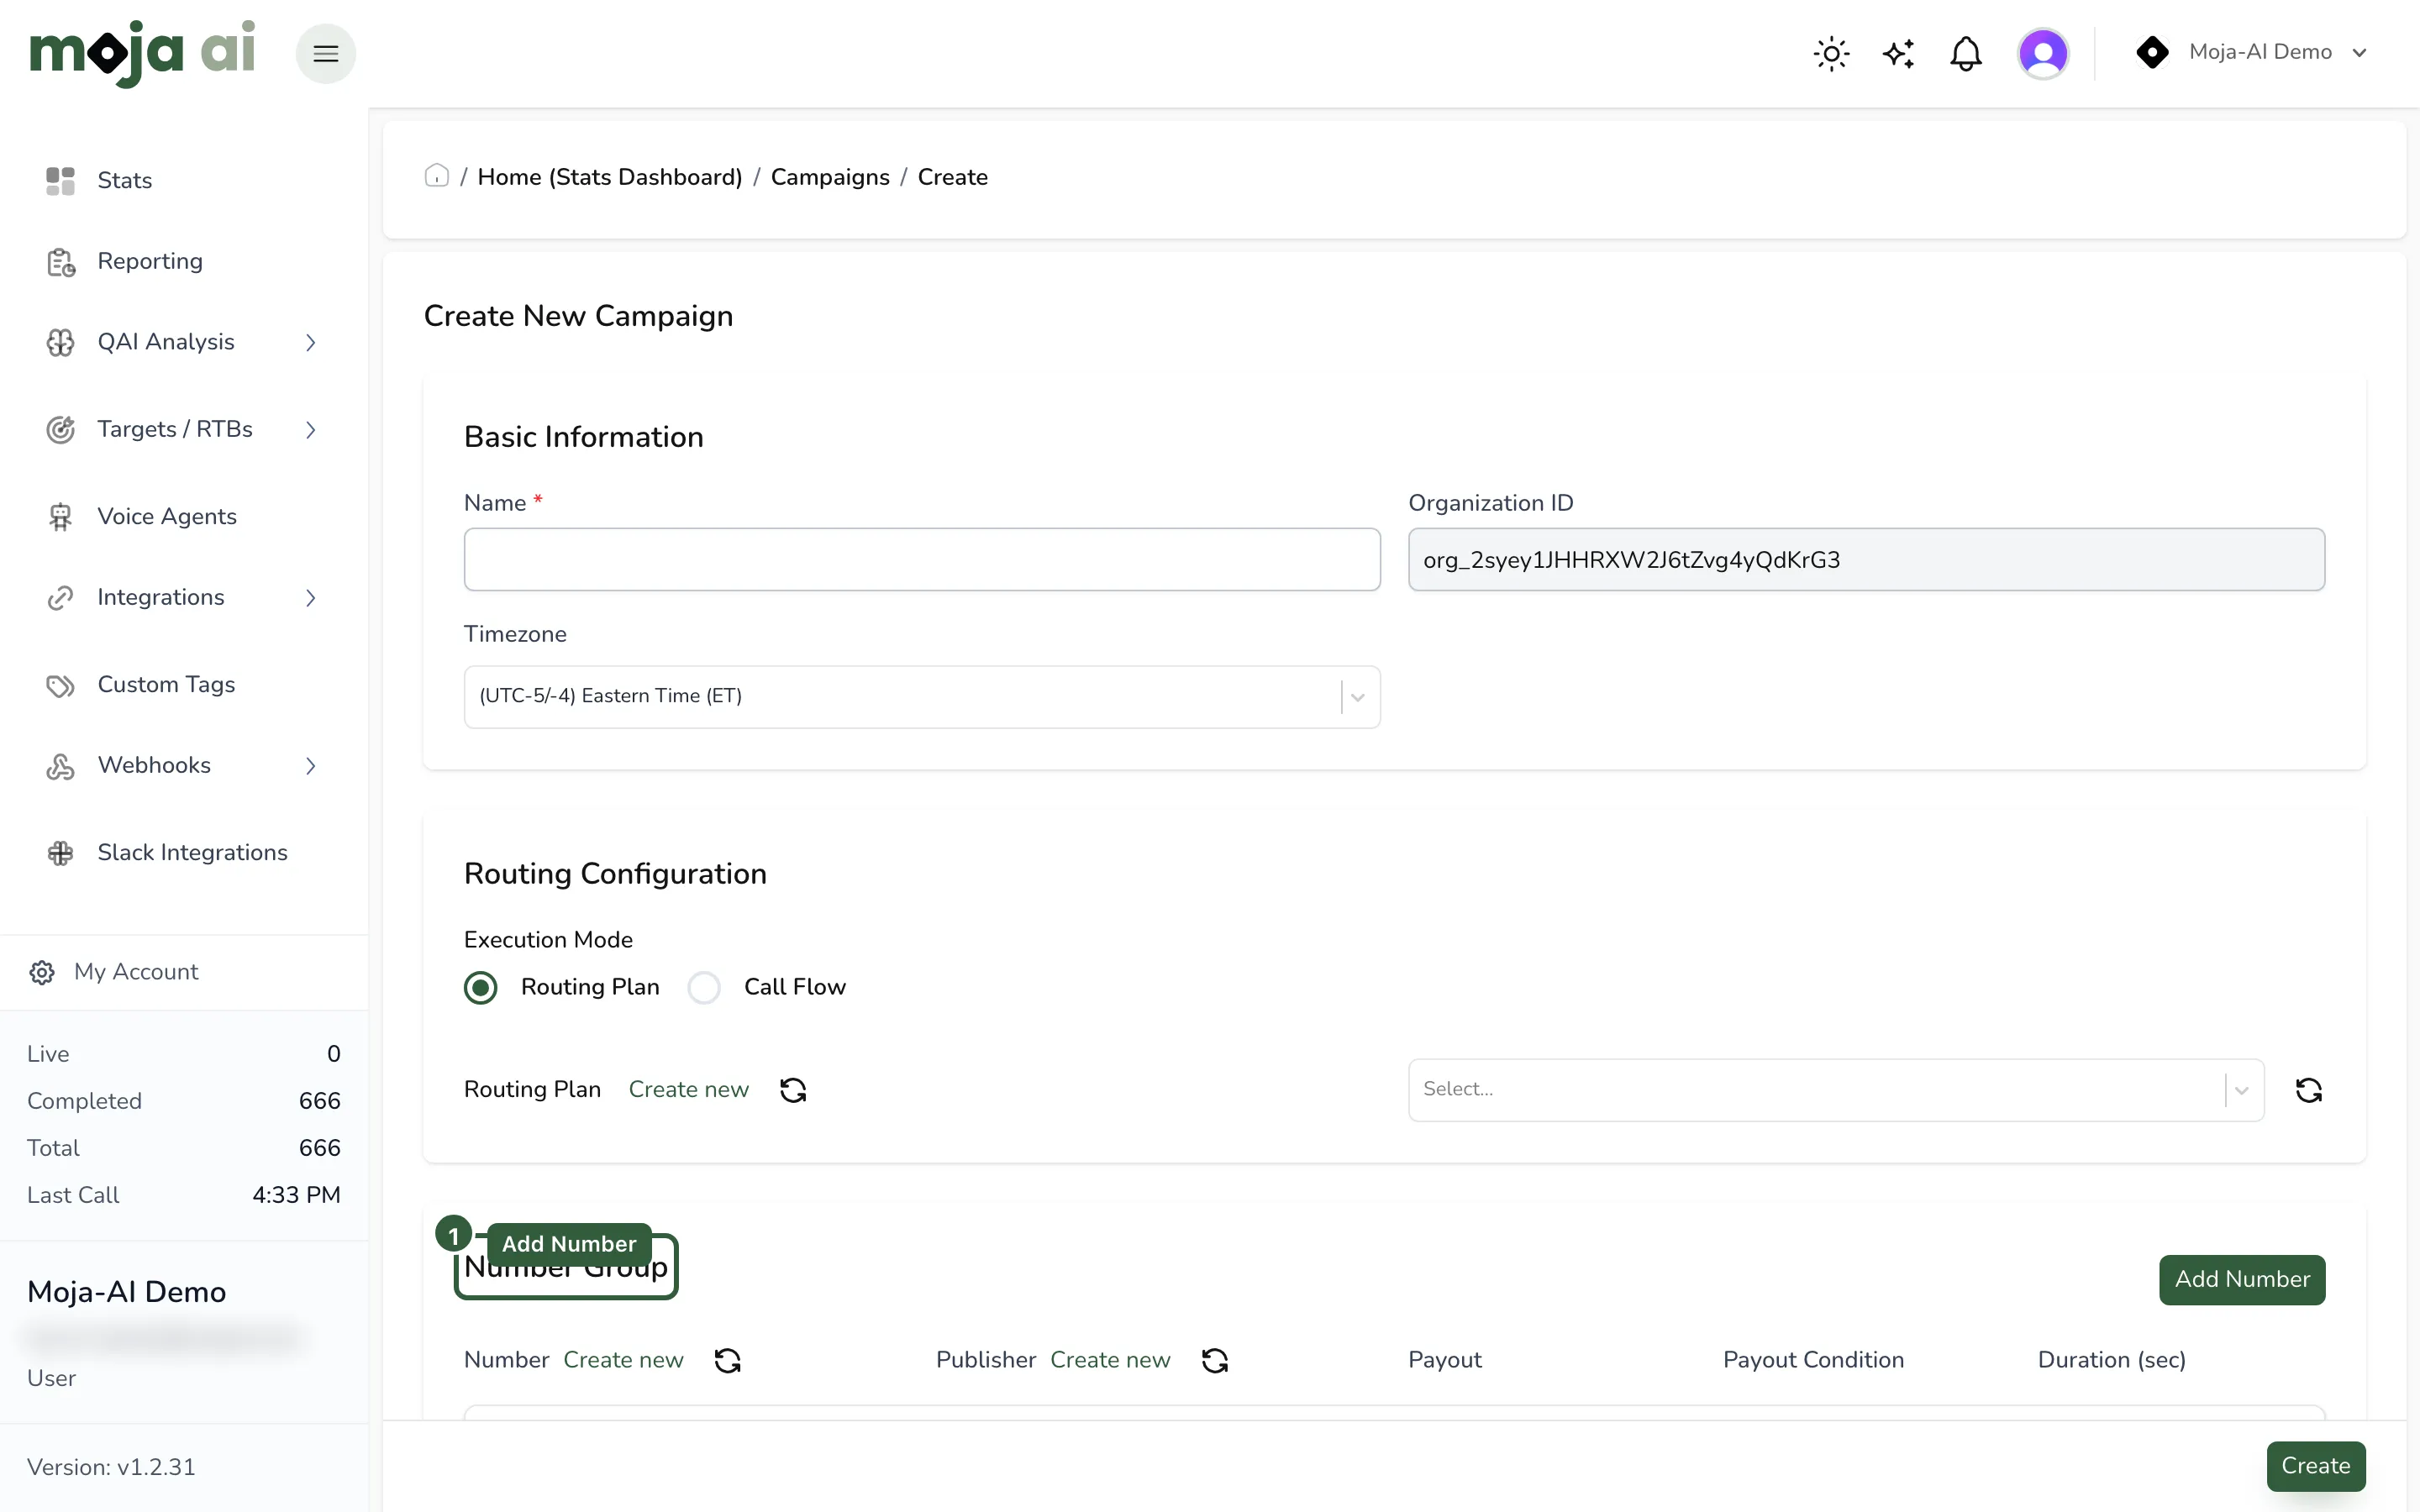
- In the Number Group section, click Add Number.
- If no number is available, click Create New under Number.
- Search by ZIP code, city, state, or toll-free.
- Select an available number and click Purchase Selected.
- Confirm the purchase when prompted.
- Refresh the page if the number does not appear, then select it from the dropdown.
Expected result: the number is attached to the campaign and shows as active.
Step 10 — Assign the publisher and set the publisher payout
Section titled “Step 10 — Assign the publisher and set the publisher payout”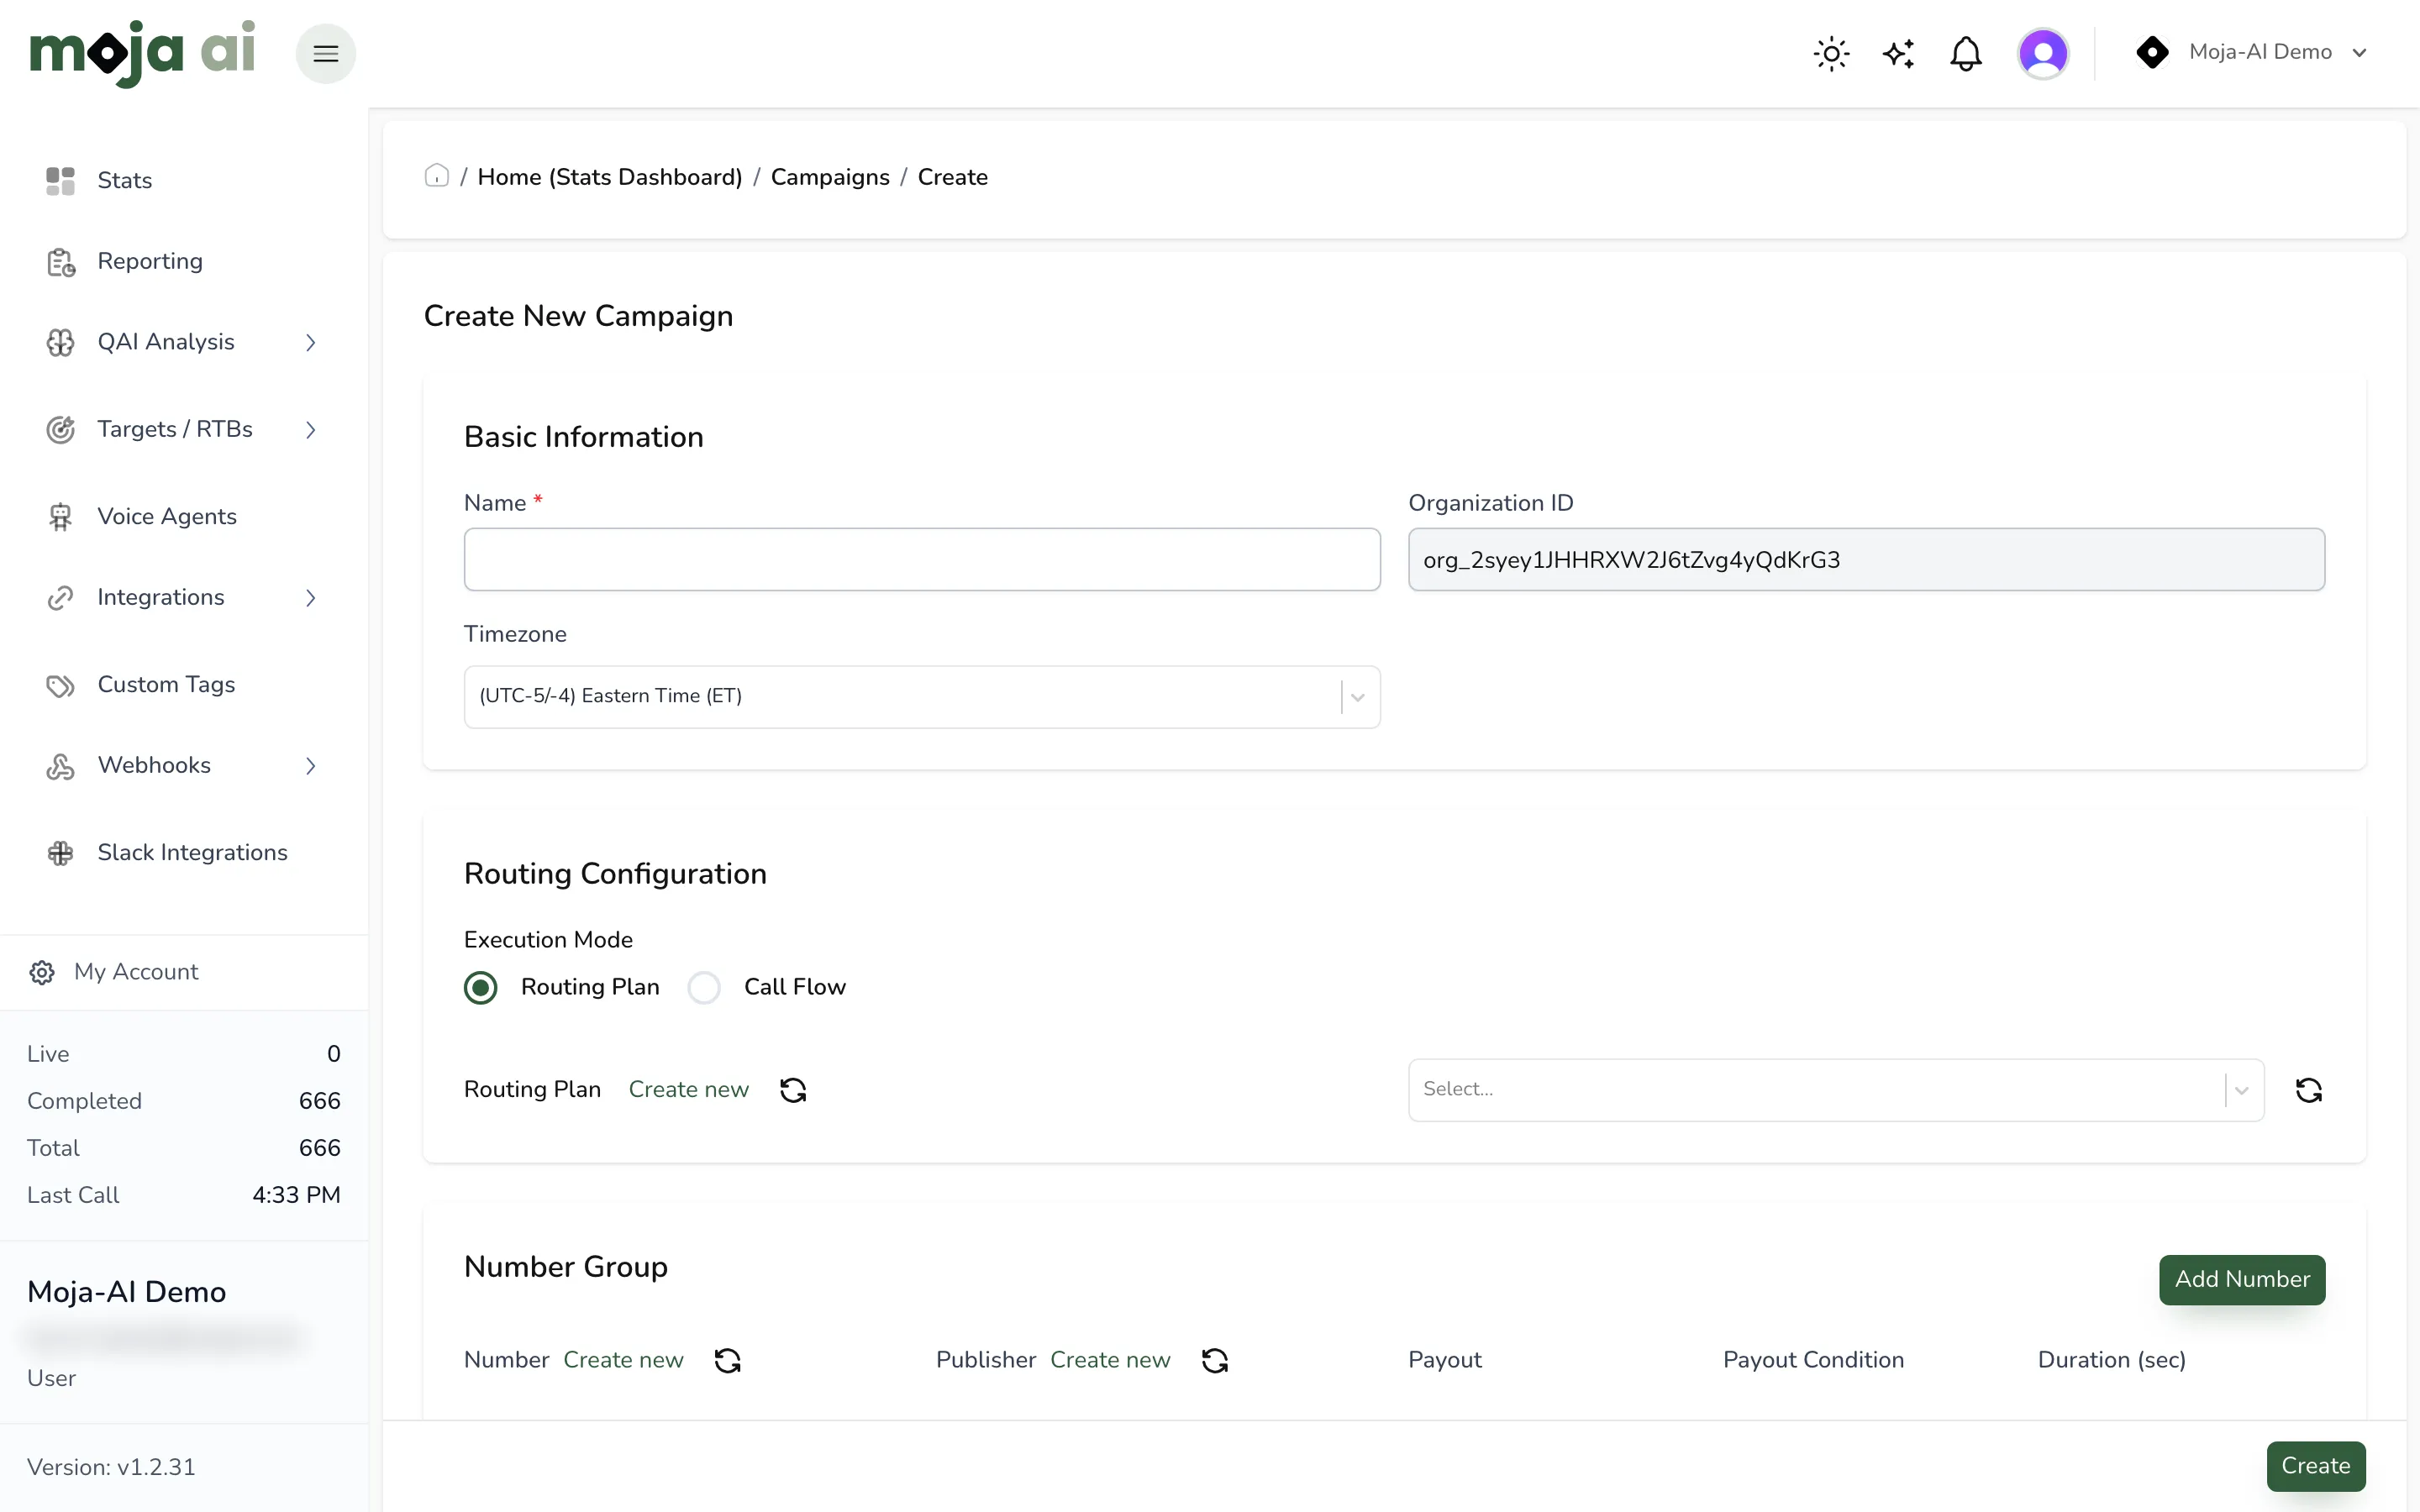
- Select the publisher associated with the tracking number.
- Enter the publisher payout amount, for example $15.
- Confirm the payout logic leaves the margin you expect against the buyer payout from step 4.
- Choose the payout condition, for example Call Converted.
Expected result: the publisher is paid only when the buyer-side conversion condition is met. If you set the publisher payout on call connect and the buyer payout on 90 seconds connected, you will pay out on calls you were not paid for.
Step 11 — Set the campaign-level options
Section titled “Step 11 — Set the campaign-level options”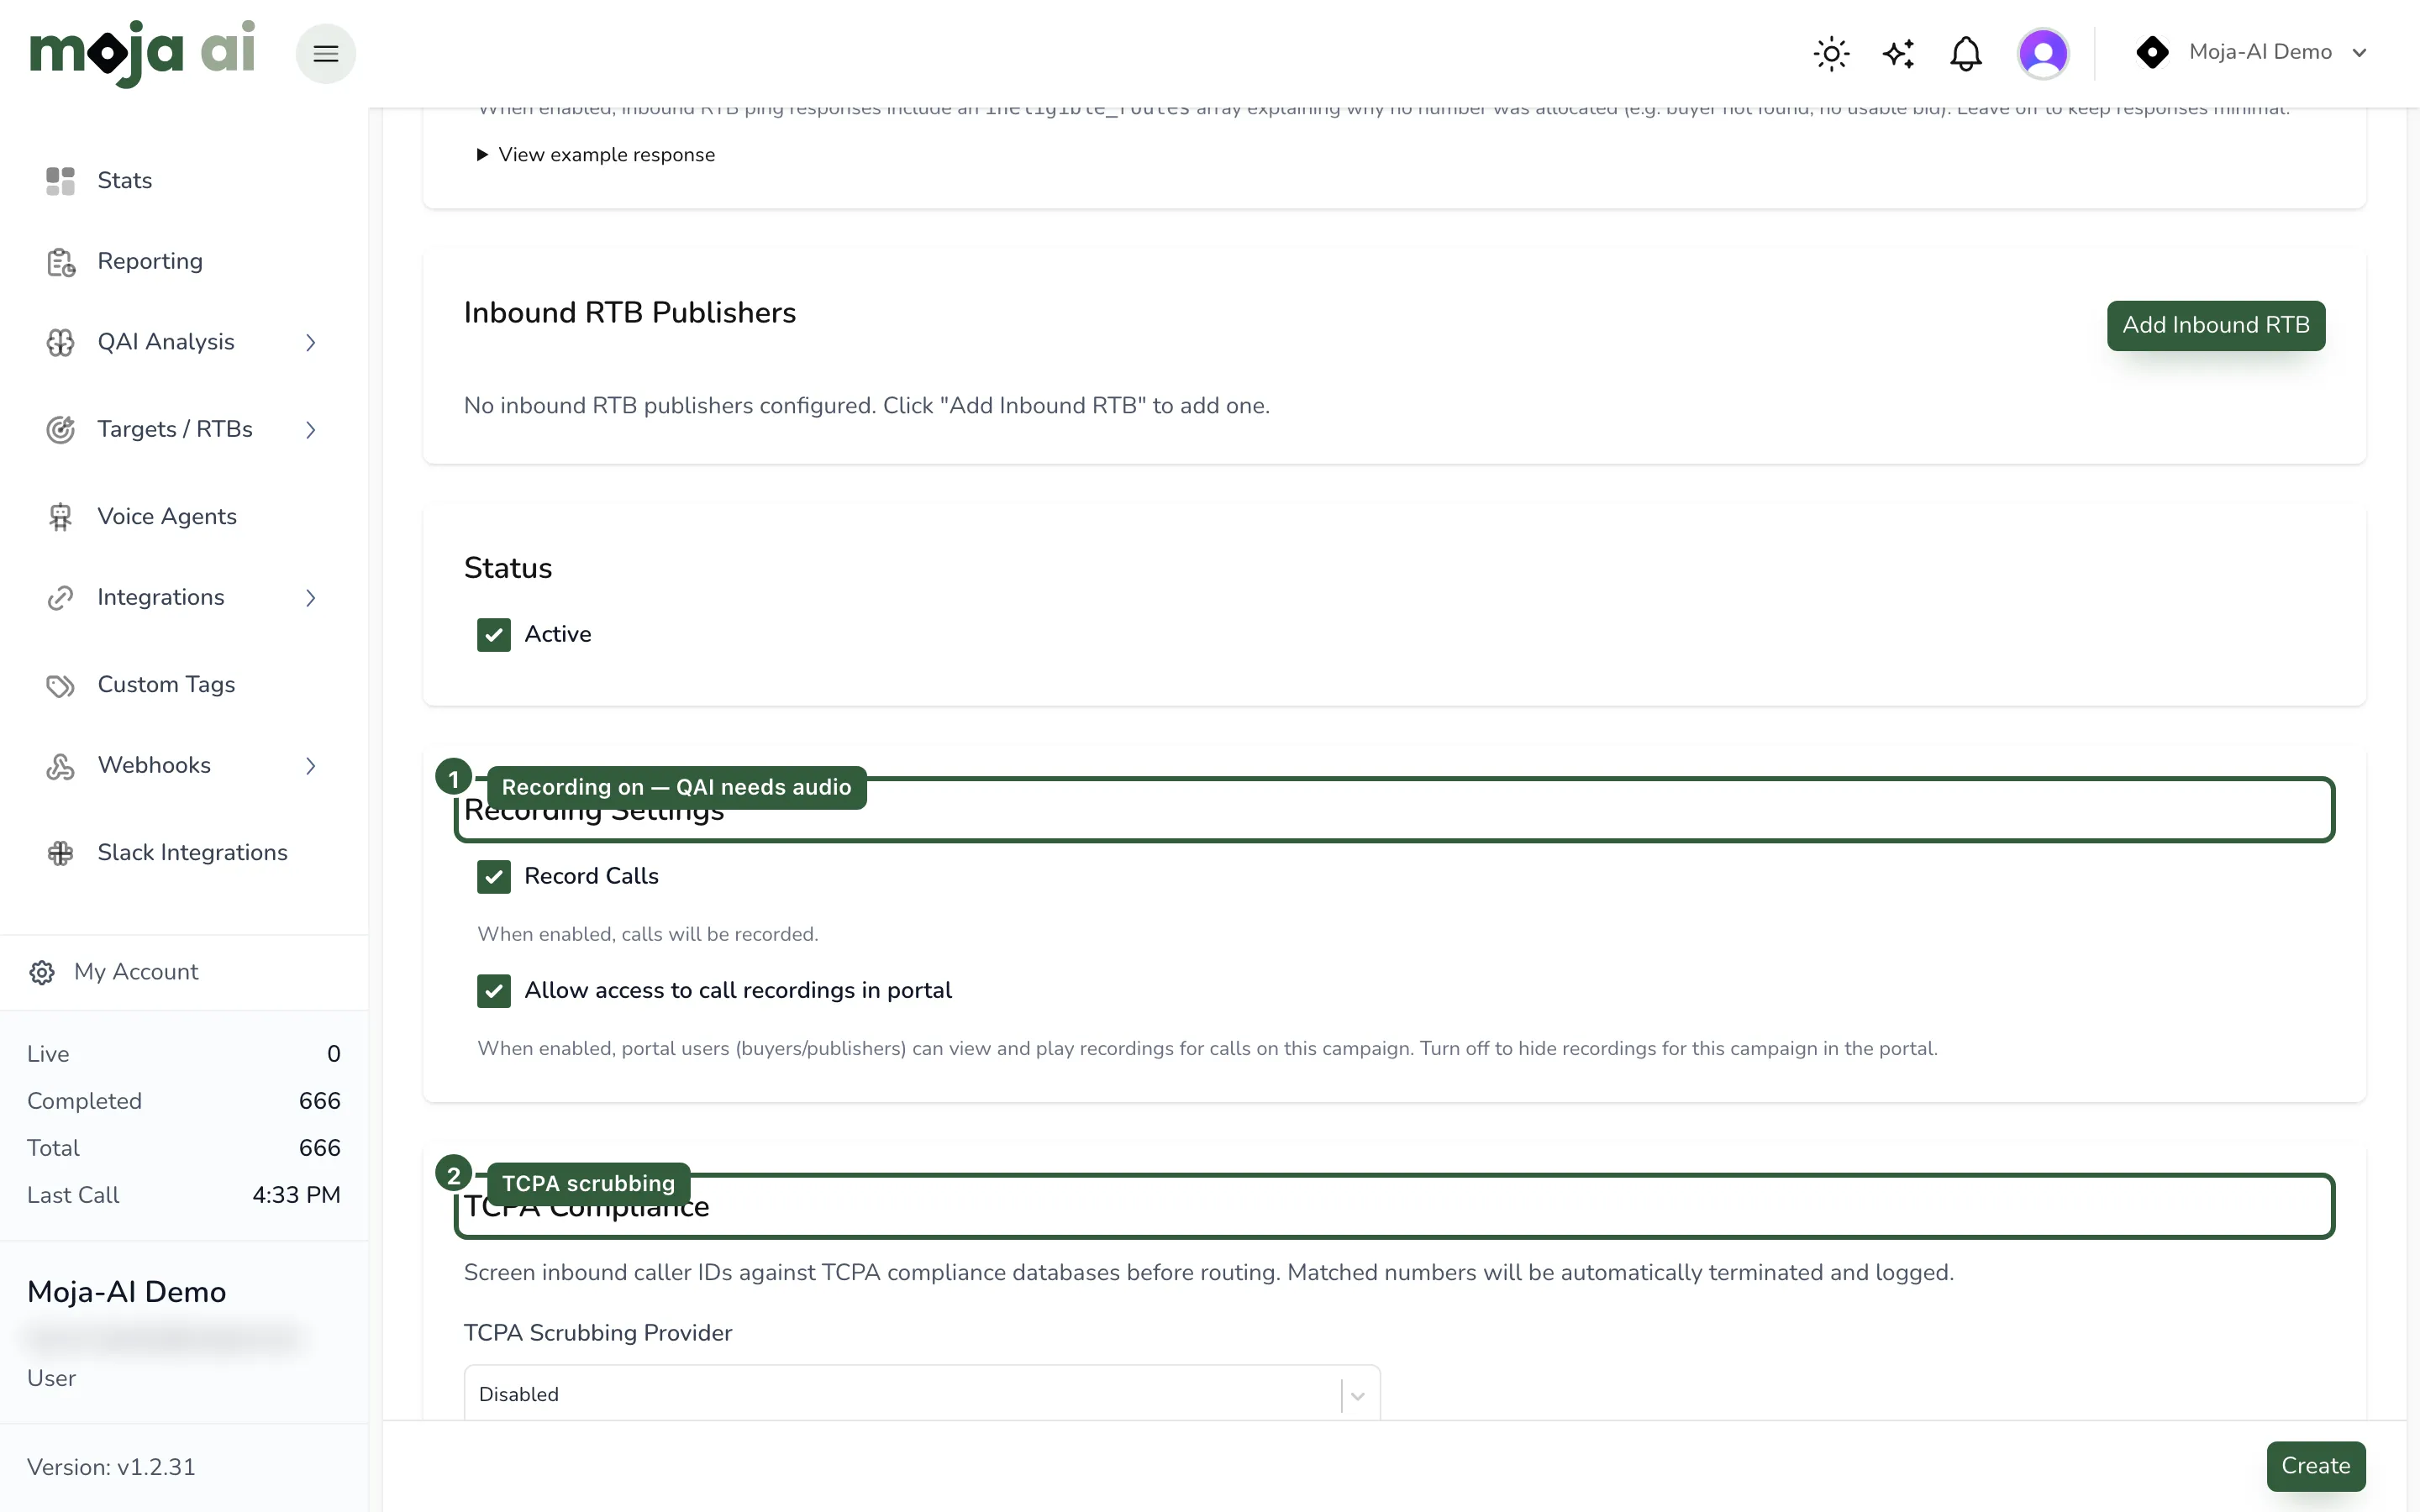
- Confirm the campaign status is Active.
- Decide whether call recording should be on. QAI and Voice Agent review both depend on it.
- If compliance scrubbing is required, configure the TCPA scrubbing provider — the default Moja option or a third-party API key.
- Use Test Connection to validate any external scrubbing integration.
Expected result: the campaign is active and any external integration reports a successful test.
Step 12 — Review the advanced settings you are deliberately not using
Section titled “Step 12 — Review the advanced settings you are deliberately not using”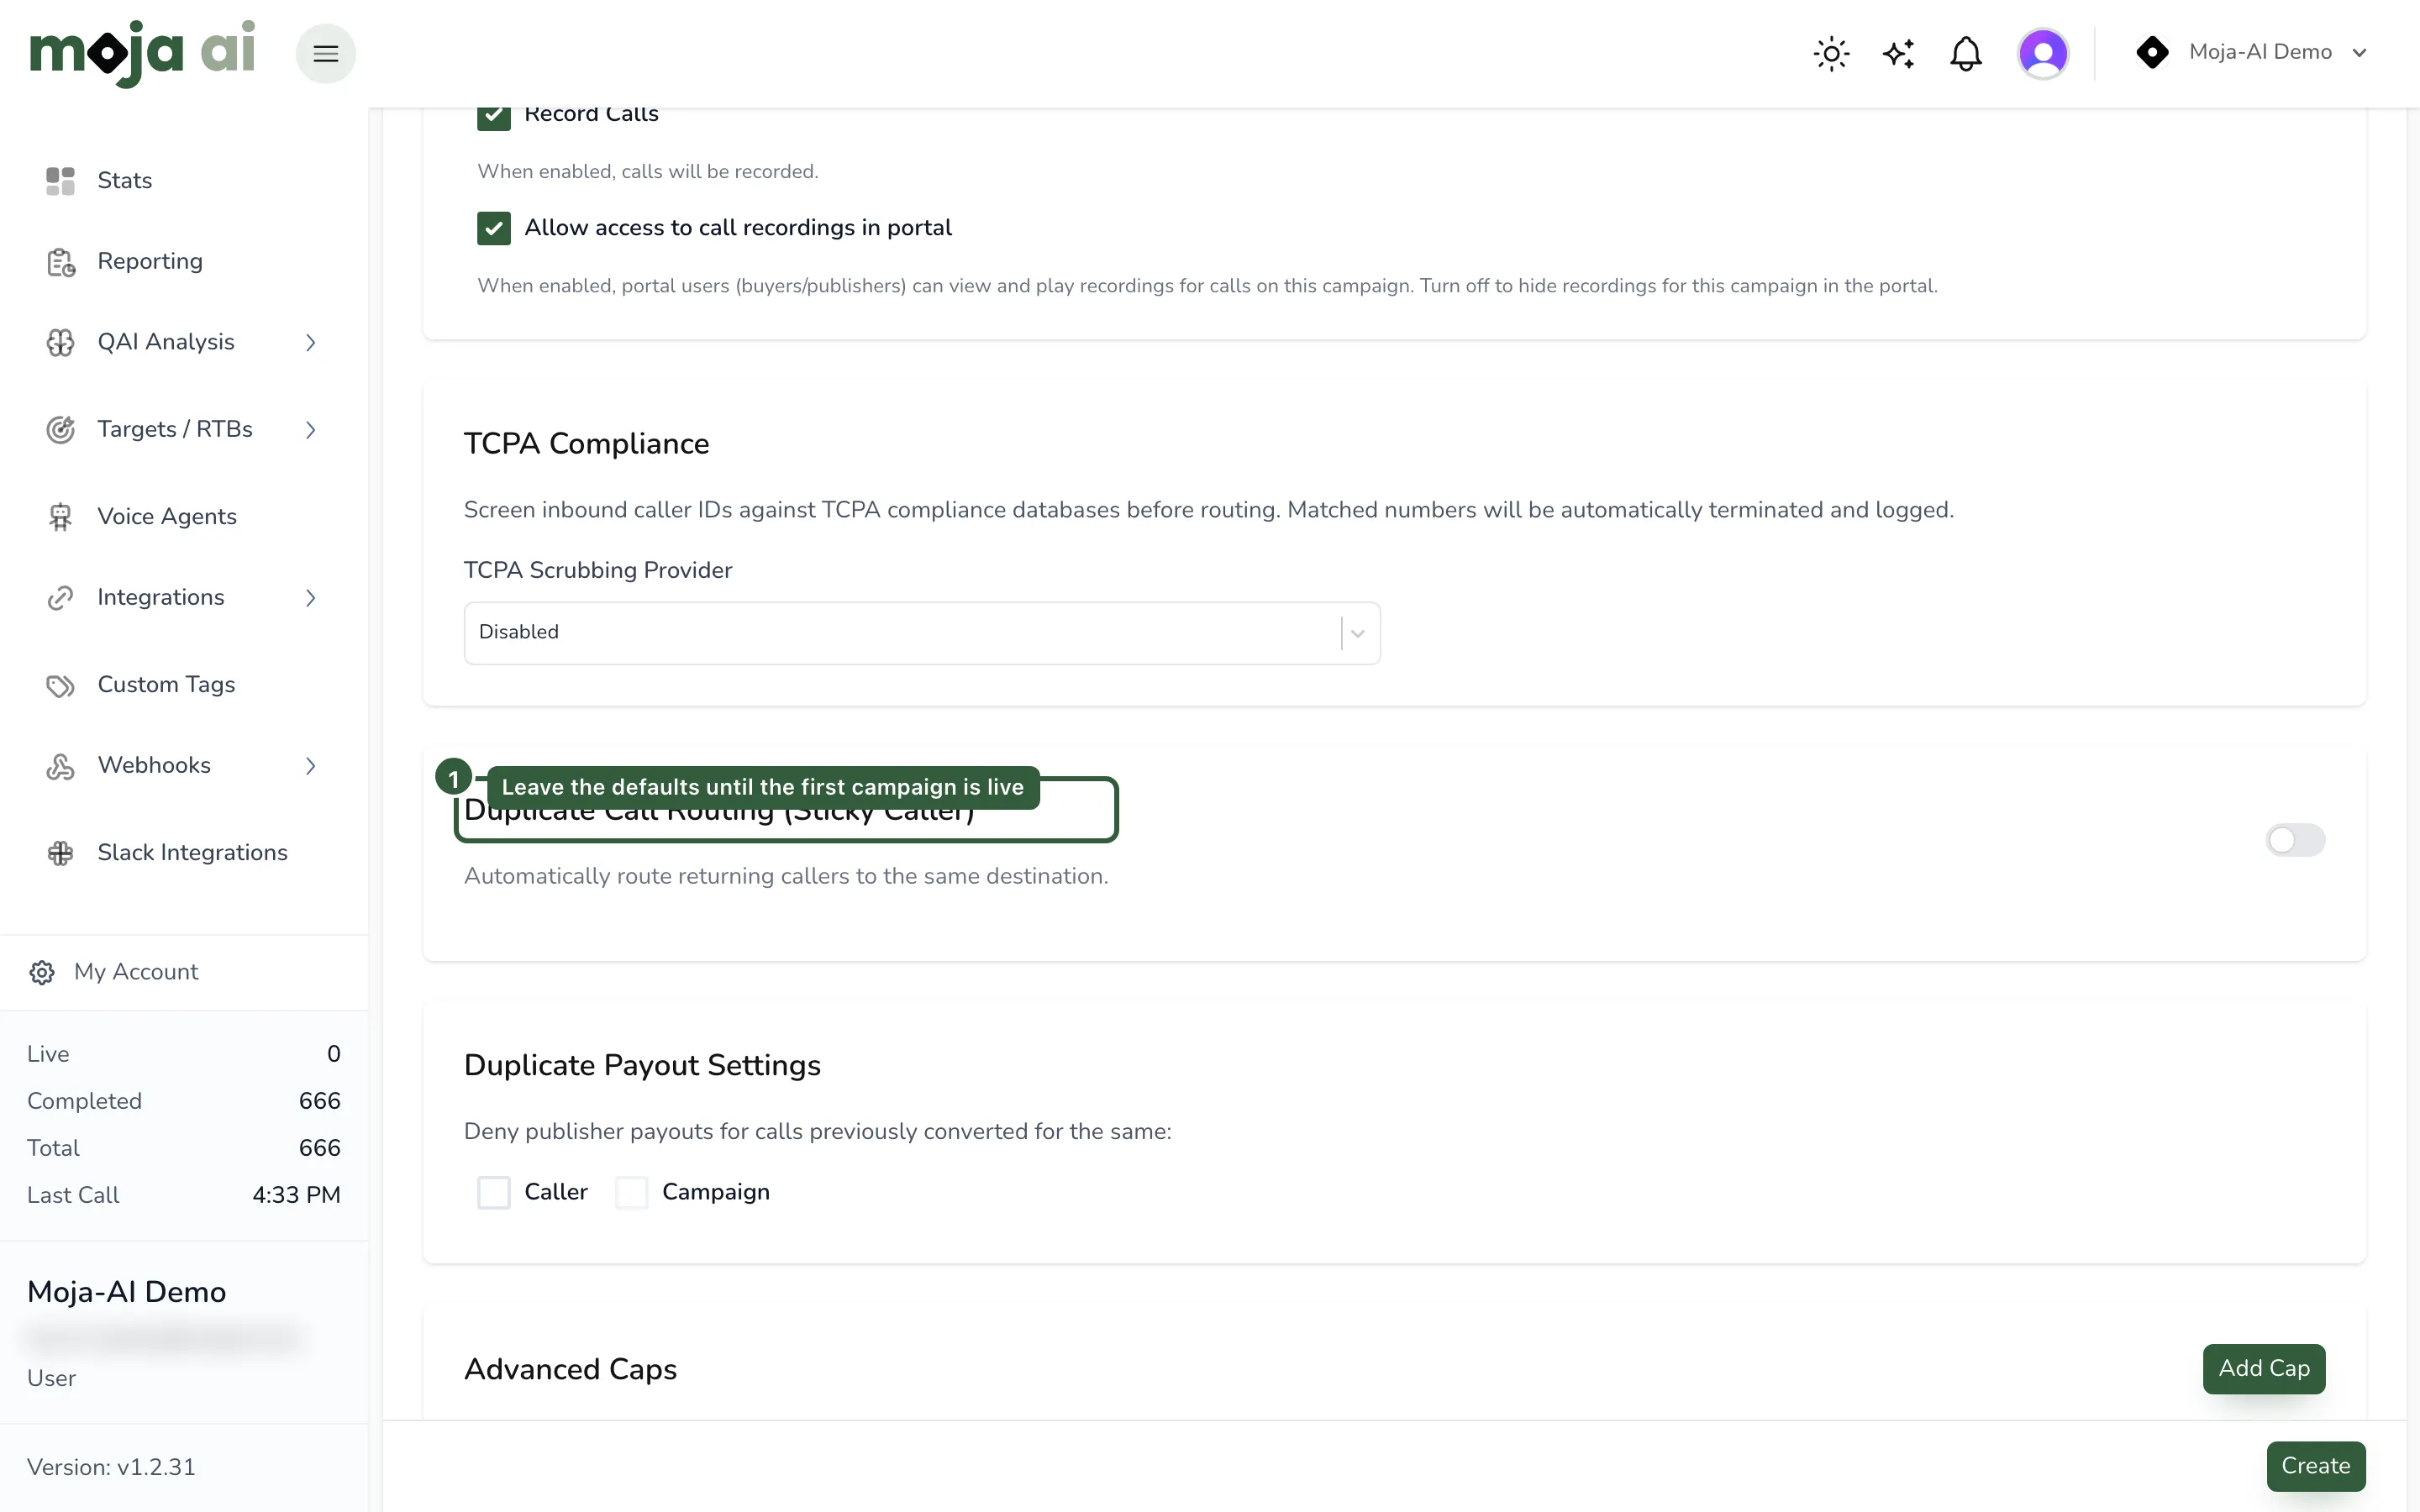
Before saving, check that each of these is off unless you have a specific reason:
- Duplicate call routing — only if your buyer agreement requires special handling for repeat callers
- Duplicate pair routing — only to prevent repeat payouts inside a defined period
- Publisher caps — only to limit volume or revenue by publisher
- Incoming or outgoing webhooks — only if an external system needs the events
- QAI — if you are using it, add a disposition and its qualifying questions
Save the campaign.
Expected result: the campaign saves and appears in the Campaigns list as active.
Step 13 — Confirm the whole chain
Section titled “Step 13 — Confirm the whole chain”View screenshot: create and verify campaign
Open the saved campaign and confirm each of these reads the way you set it: campaign name, timezone, execution mode, routing plan, target, tracking number, publisher assignment, publisher payout, active status, recording setting, and duplicate settings.
Use the open-in-new-window icons to inspect the routing plan and target without losing your place.
Verify it works
Section titled “Verify it works”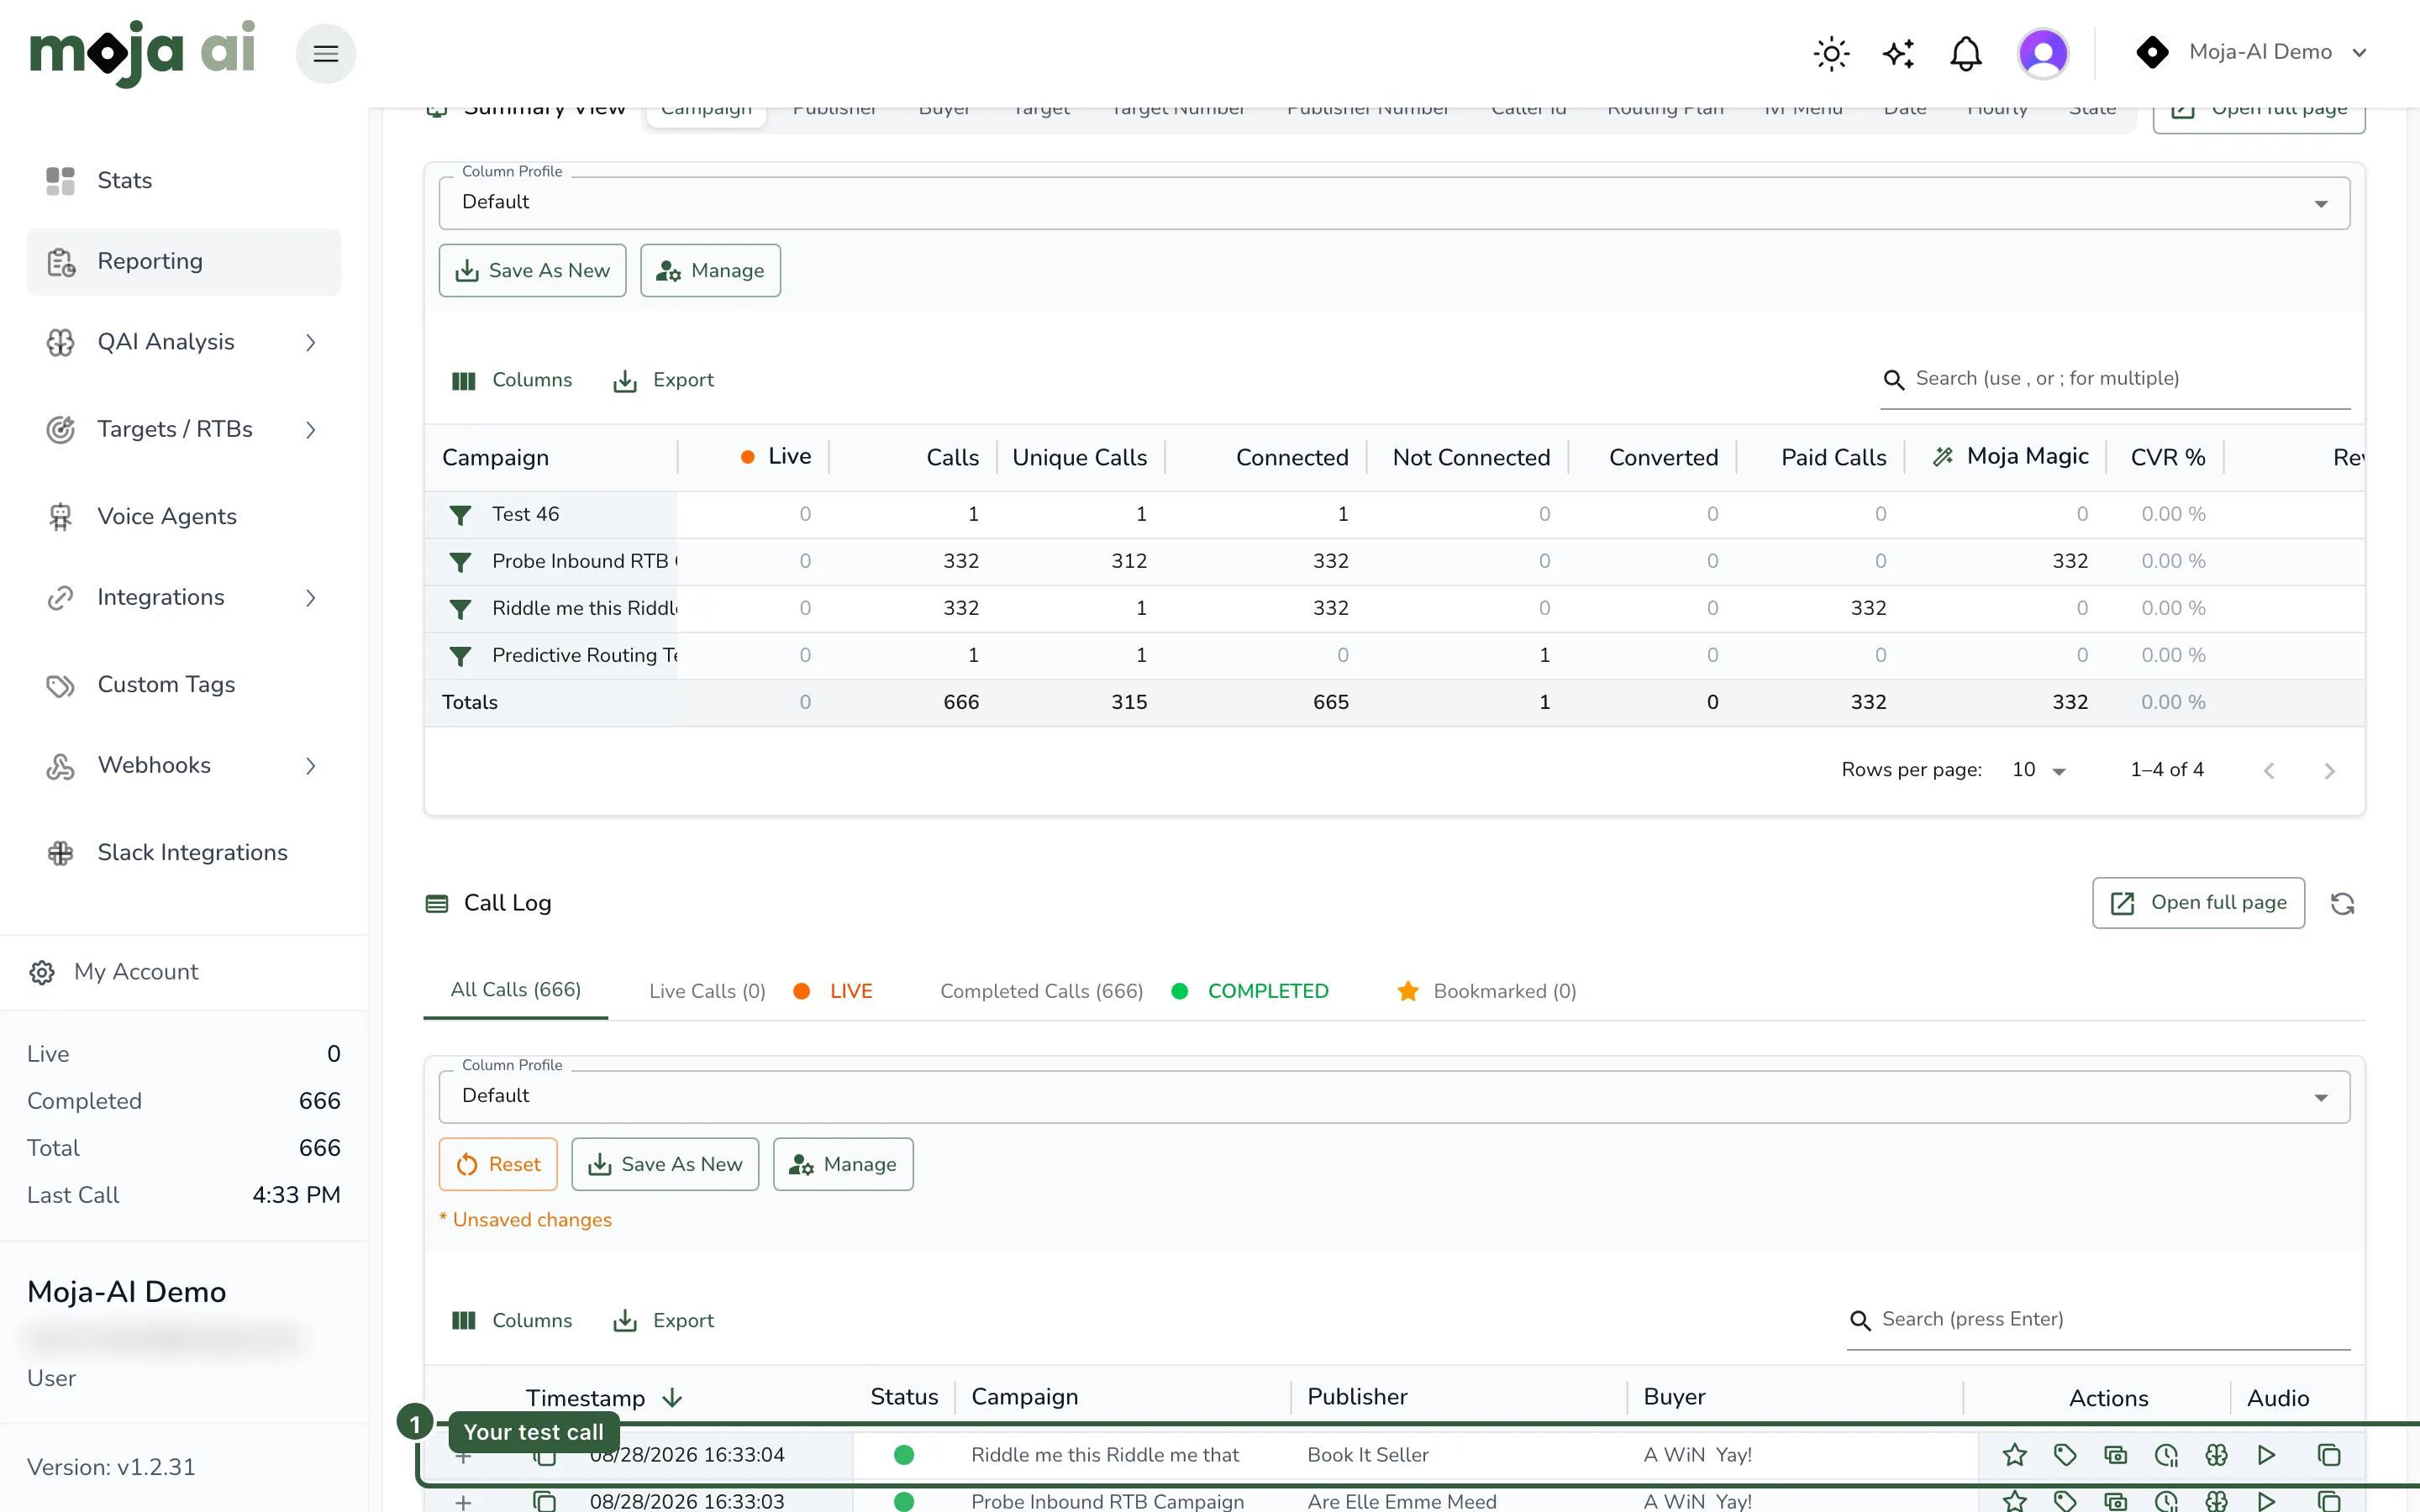
-
Place a test call to the campaign tracking number. Stay on the line past the conversion threshold you set in step 4 — a 30-second call against a 90-second rule proves nothing about payouts.
-
Open Reporting → Call Logs and find the call.
-
Confirm the row shows the campaign name, publisher attribution, routing plan, buyer result, call length, caller ID, tracking number, and payout status.
-
Expand the call detail and open Call Life to see the route the call actually took.
-
Confirm a payout was created according to the conversion rule.
Success looks like: one row in the call log, attributed to the right publisher and campaign, connected to your target, with a duration over the conversion threshold and a payout recorded on both the buyer and publisher side.
Column-by-column detail is in the Call log column dictionary.
Troubleshooting
Section titled “Troubleshooting”| Symptom | Likely cause | Fix |
|---|---|---|
| Call rings then drops | No target accepted it — schedule closed, concurrency cap reached, target inactive, or a failing agent availability check | Why are my calls not connecting? |
| No call log row at all | The tracking number is not attached to the campaign, or the campaign is inactive | Re-check steps 9 and 11 |
| Call connects, revenue is zero | The conversion rule was not met, or payout is unset on the target | Why am I getting calls but no revenue? |
| Call is attributed to the wrong campaign | The tracking number is attached to more than one place, or the wrong number was dialled | Check the number’s campaign assignment under Numbers |
| Second test call from the same phone earns nothing | Duplicate rules are treating it as a repeat caller | Configuring sticky caller and duplicate call routing |
| Calls fail only at certain hours | Campaign and target timezones disagree | Compare the timezone in steps 4 and 8 |
Before you scale
Section titled “Before you scale”- Confirm publisher and buyer payout terms in writing before you create targets — changing a conversion rule after traffic starts makes reconciliation painful.
- Compliance scrubbing may carry a per-call cost. Check pricing before enabling it.
- Call recording settings can be overridden by buyer or publisher settings above the campaign.
- QAI disposition tracking requires a QAI subscription.
- Use consistent naming — Test Publisher 1, Test Buyer, Test Routing Plan — so a broken chain is readable at a glance.
Related
Section titled “Related”- Getting started as a buyer or network — the shorter orientation version of this path
- Purchase a phone number
- Call flows — when routing needs branching, IVR, or pre-bridge checks
- Advanced caps: volume and spend guardrails
- How to read call logs
Last reviewed: August 2026.